Shipping
At Piyovi, all your shipments can be executed from a single screen. The Ship screen is comprehensive of all features required to process any of your shipments irrespective of mode, destination, and material type.
Overview of Shipping Process
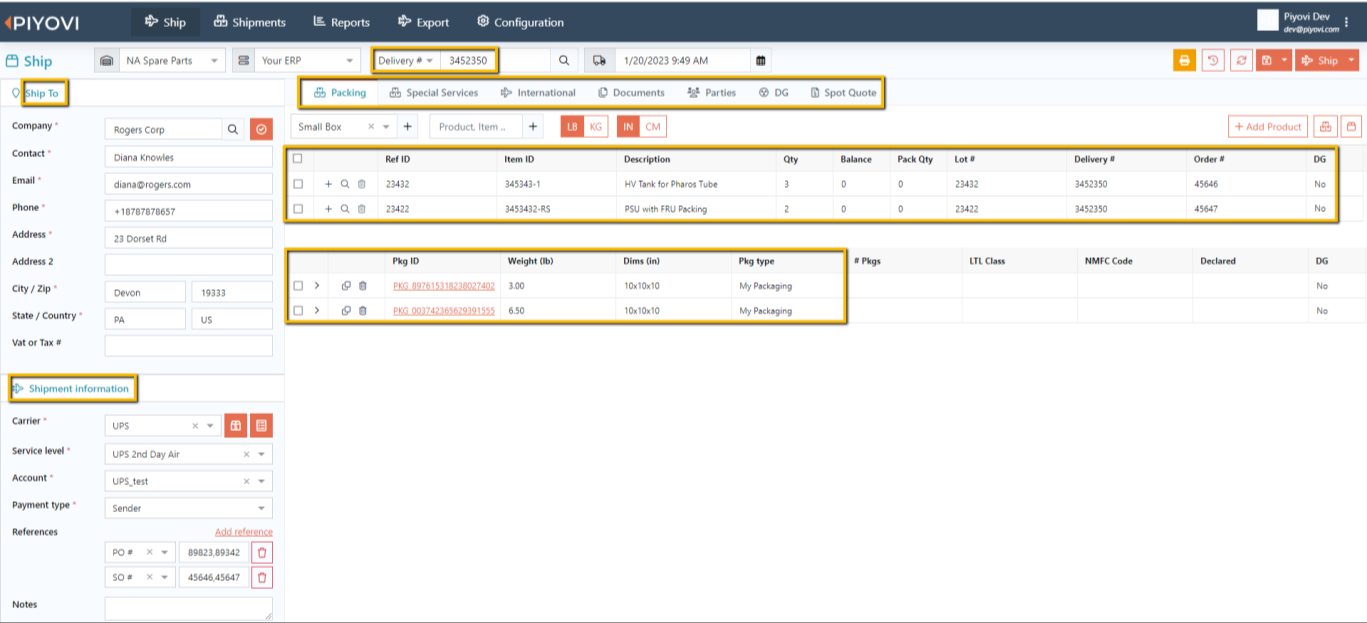
- Scan your reference document (e.g., sales order, delivery, shipment, etc.) to pull all the details from your source (e.g., ERP/WMS) system. Alternatively, you can manually enter shipment/item details or select products from Piyovi’s product table and provide quantities.
- If packing is not completed, follow the instructions for packing.
- Compare options for available ship methods with associated freight cost and estimated delivery date.
- Apply business rules to update ship method, get customer account number, find out any specific packing/shipping instructions, etc., if your administrator configures rules.
- Choose to spot quote to obtain rates on an ad-hoc basis for a single shipment.
- Enter any additional relevant details about the shipment if applicable:
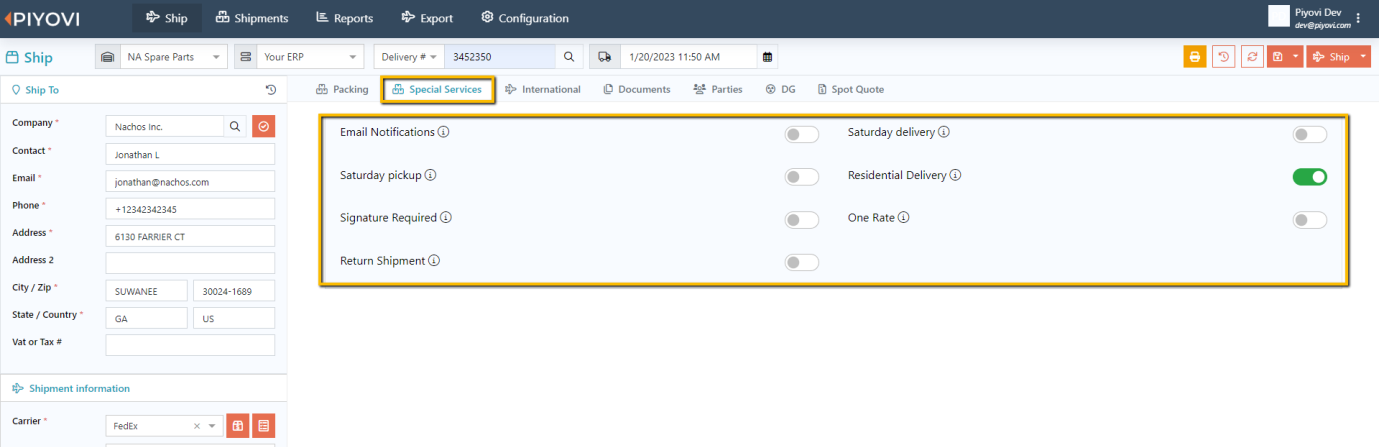
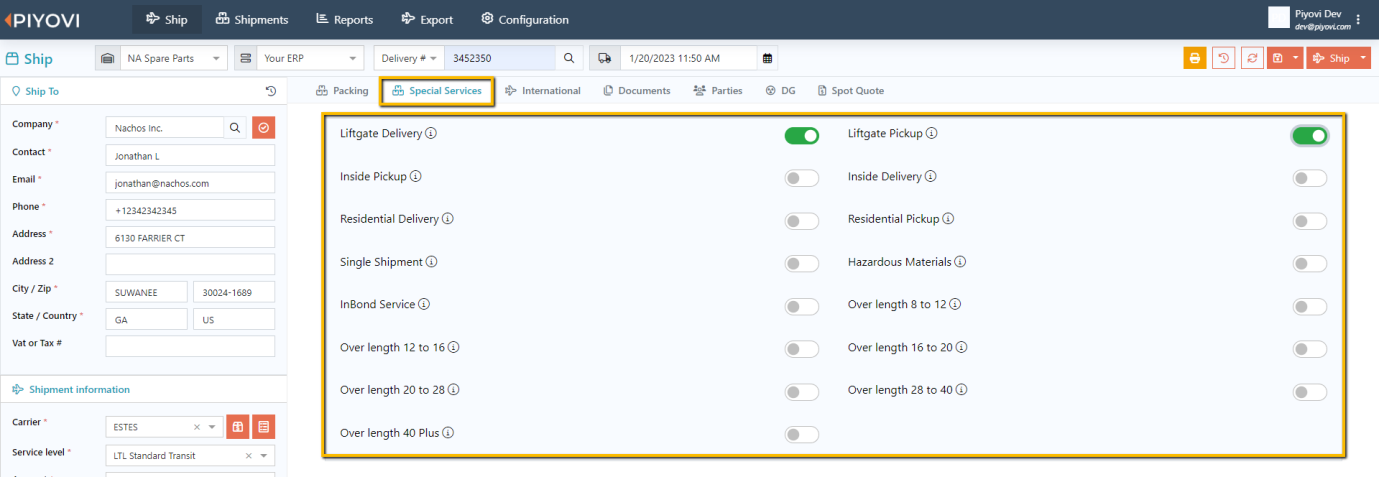
- Special Services (e.g., residential delivery, lift gate, etc.) – These are carrier/mode-specific and change dynamically based on carrier selection. Only options that are activated by your administrator are visible in the ship screen. Please find below two examples: FedEx & ESTES.
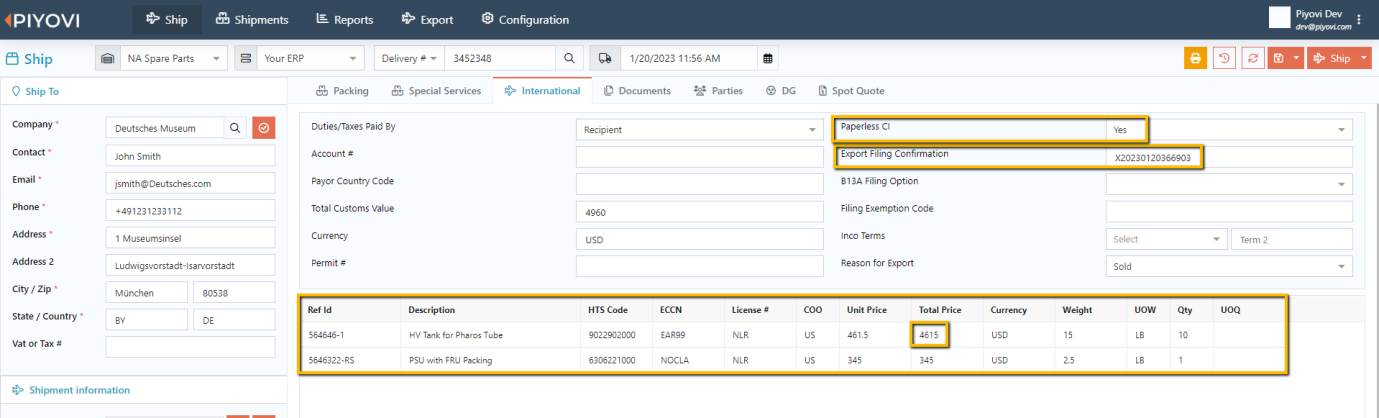
- International details (e.g., ITN #, HTS Code, ECCN, Customs Value, etc.):
- Paperless CI feature is available for FedEx, UPS, and DHL international shipments. Piyovi will automatically send all necessary item/shipment details necessary to generate a commercial invoice by the carrier. Select No if you would like to not use this feature.
- Export Filing Confirmation number is the ITN # for US exports. If you have filed your EEI in Piyovi, this would be automatically populated. You can also enter manually if you have generated it outside of the Piyovi system. ITN# is required for the below example because one of the HTS codes value exceeds $2,500.
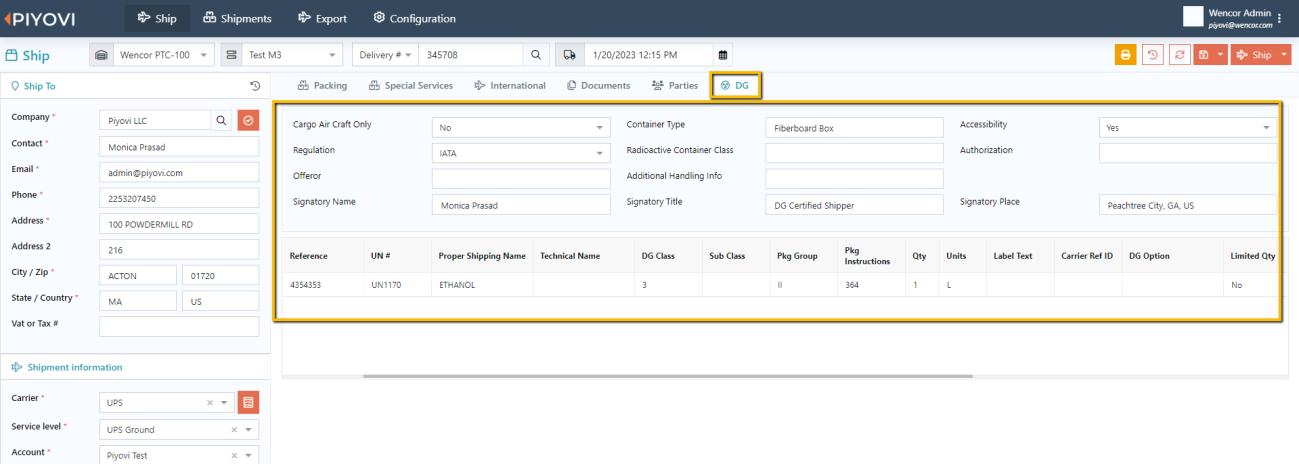
- DG details (e.g., UN#, hazardous class, etc.):
- The packing unit must be marked as DG.
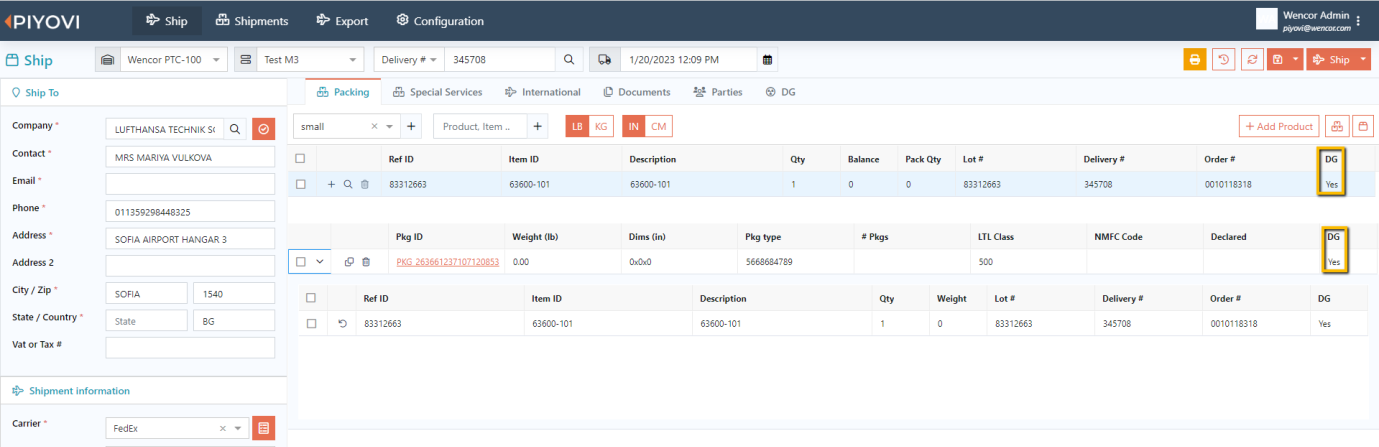
- Enter all additional DG details in the DG tab.
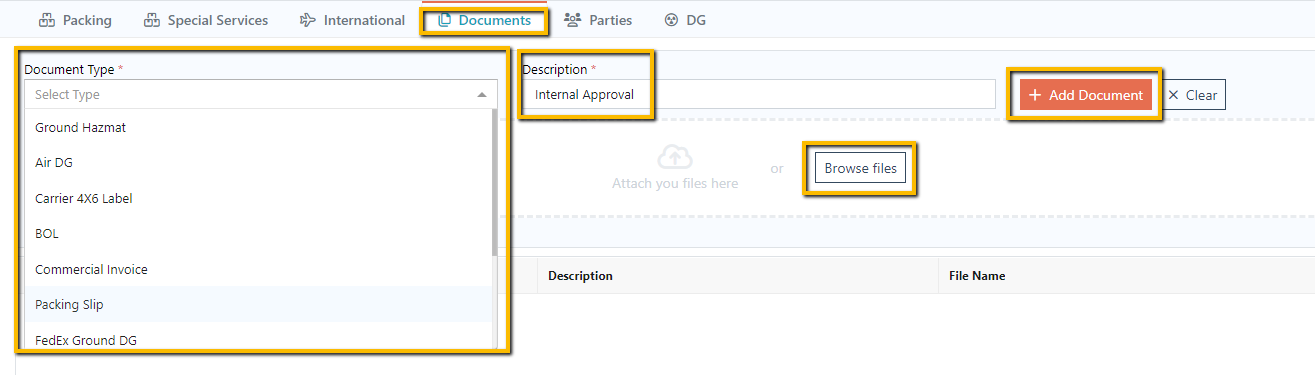
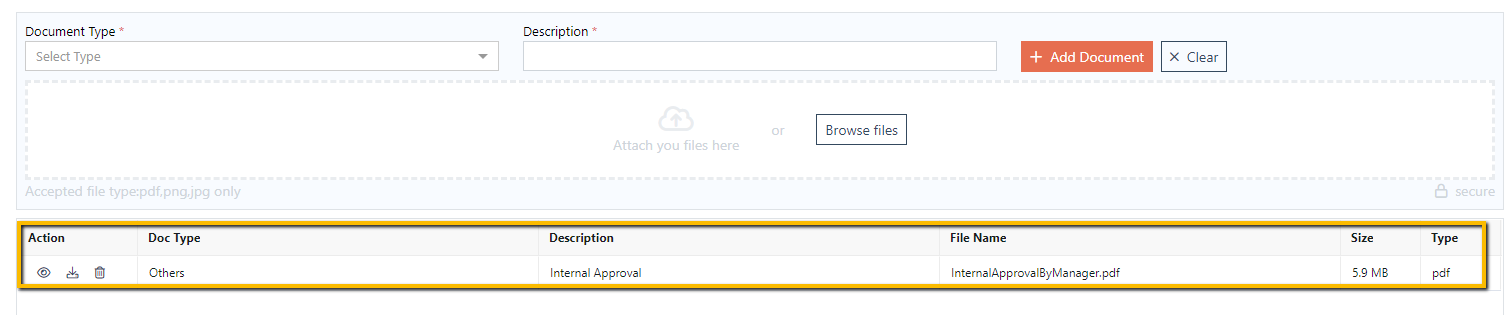
- Upload any documents that you would like to associate and store with the shipment:
- Click on the Documents tab.
- Select Document Type & Description.
- Click on Browse files and select one or more documents.
- Click on + Add Document button to upload and save the document(s) to this shipment.
- Validate your address manually or, based on your configuration, address validation will be done automatically when you click on the Ship button.
- To save a Draft, click on the Save icon.
- To execute the Shipment, click on the Ship icon. Upon execution, the following activities take place:
- Address is validated if you configure automatic address validation.
- Ensure there is no missing data. If so, the user will receive an error message.
- Send shipment data to the carrier (if it is an integrated carrier).
- Print necessary shipping documentation automatically to the configured printers.
- Save all the shipment data in Piyovi.
- Write back necessary data (e.g., freight cost, tracking number, etc.) to the source system.
- Clear the screen to process the next shipment.
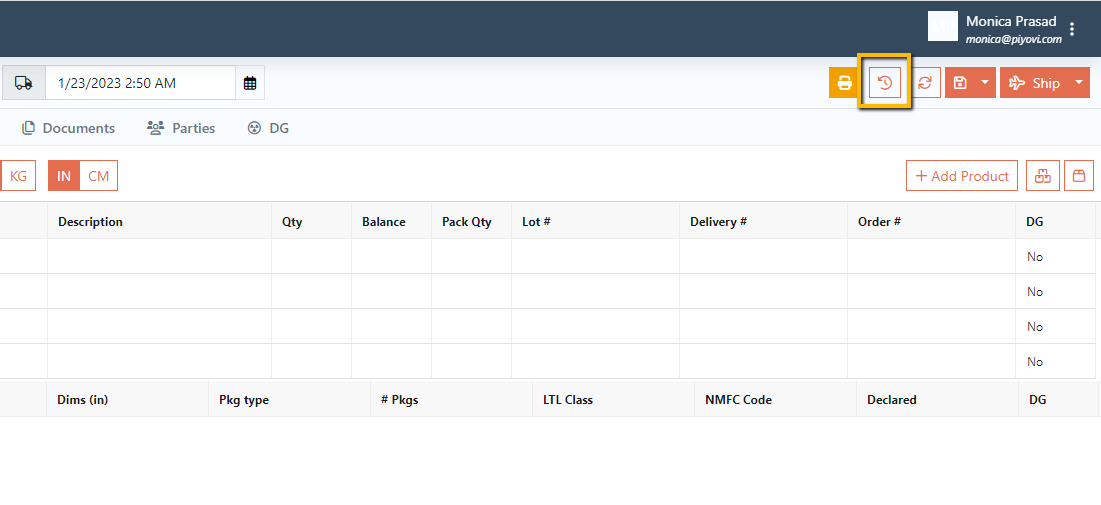
Shipment History
Once a shipment is processed, all the relevant documentation is printed, and the screen is cleared. The user can scan the next shipment number to be processed. To access recent shipments to view the tracking number, re-print documents, etc., click on the History icon.
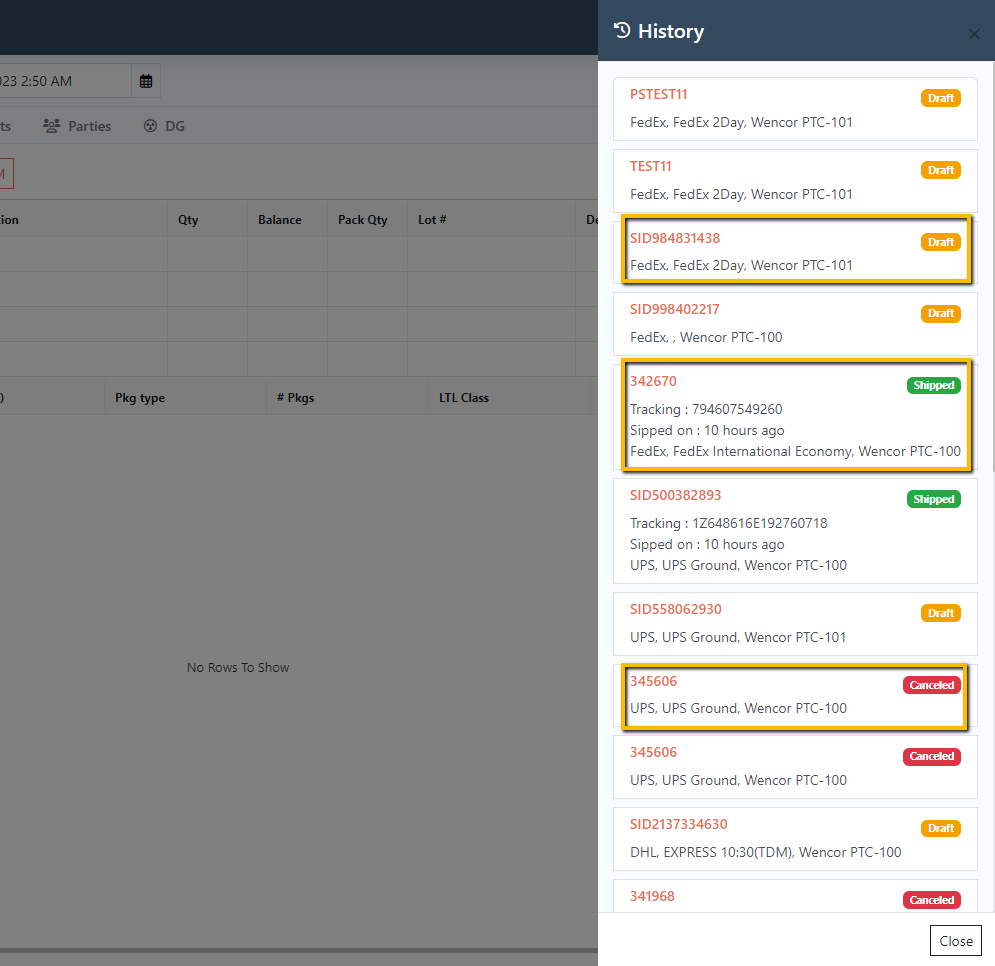
You can view shipments in the following statuses:
- Cancelled – View the details of the shipment.
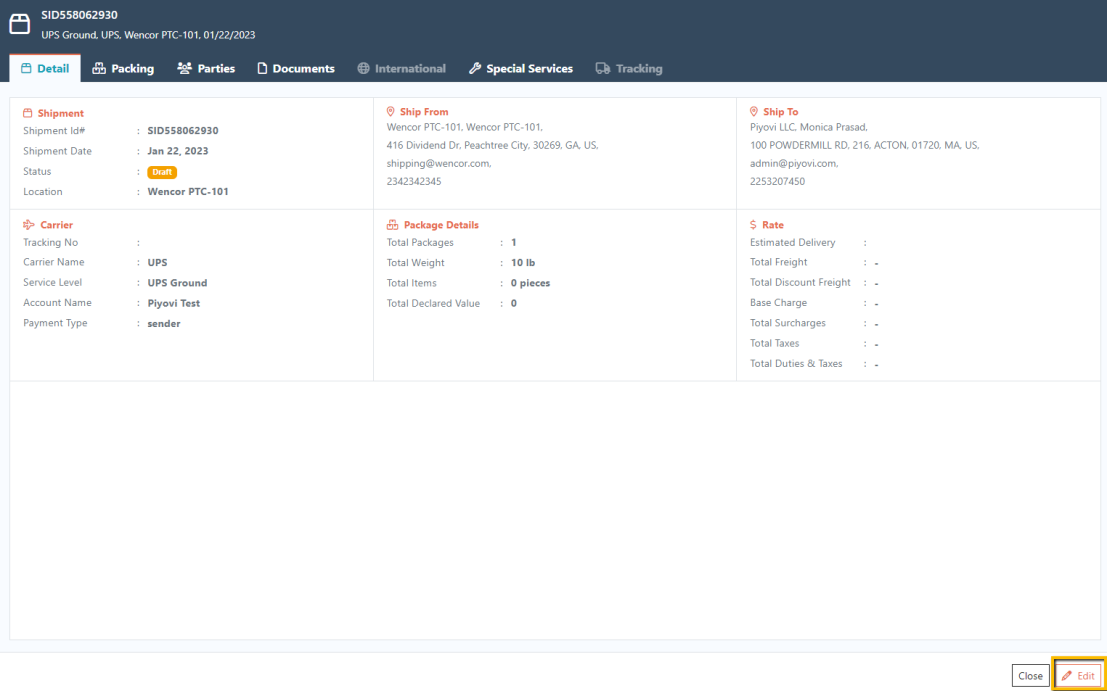
- Draft – View the details of the shipment and Edit the shipment to further process the shipment.
- Shipped – View the details of the shipment, Cancel the shipment, and view/re-print the Documents, etc.

Reprint Documents
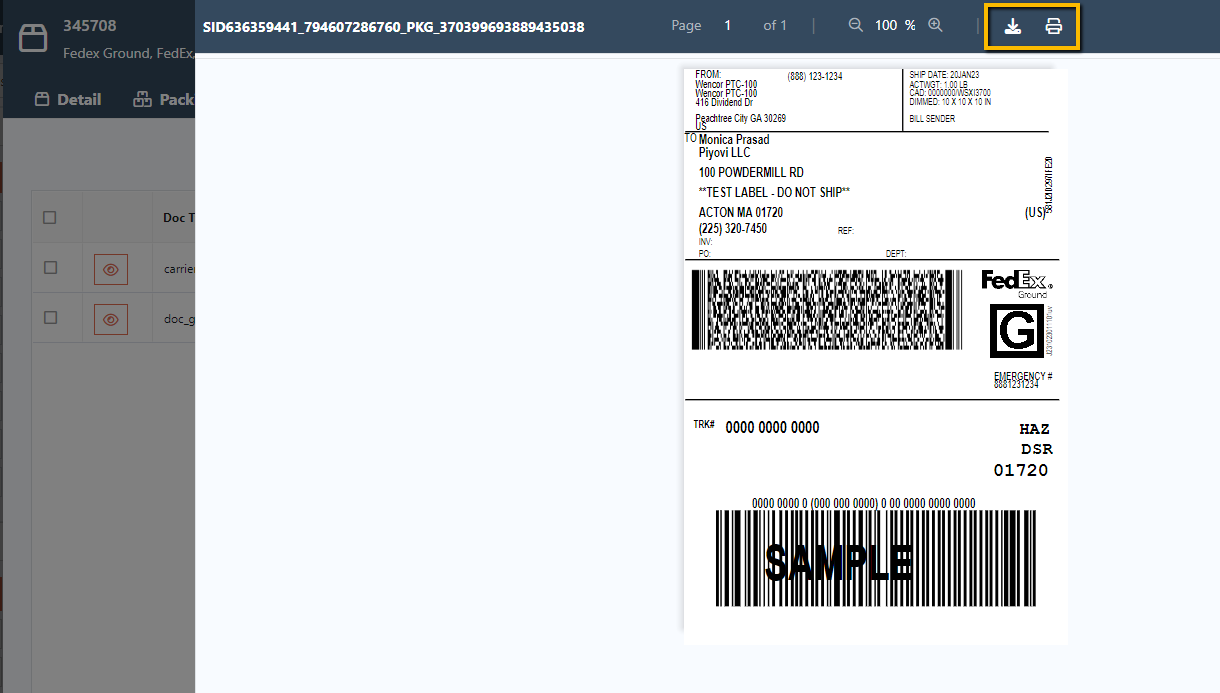
In the Documents tab, you can view all the generated documents for that shipment. You can View or Reprint your documents.

Clicking on the View icon will pop-up a preview of the document. Download and Print options are available from the preview screen.
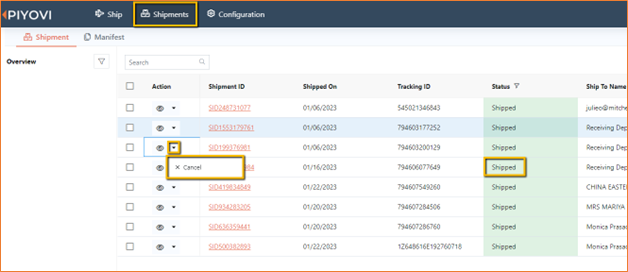
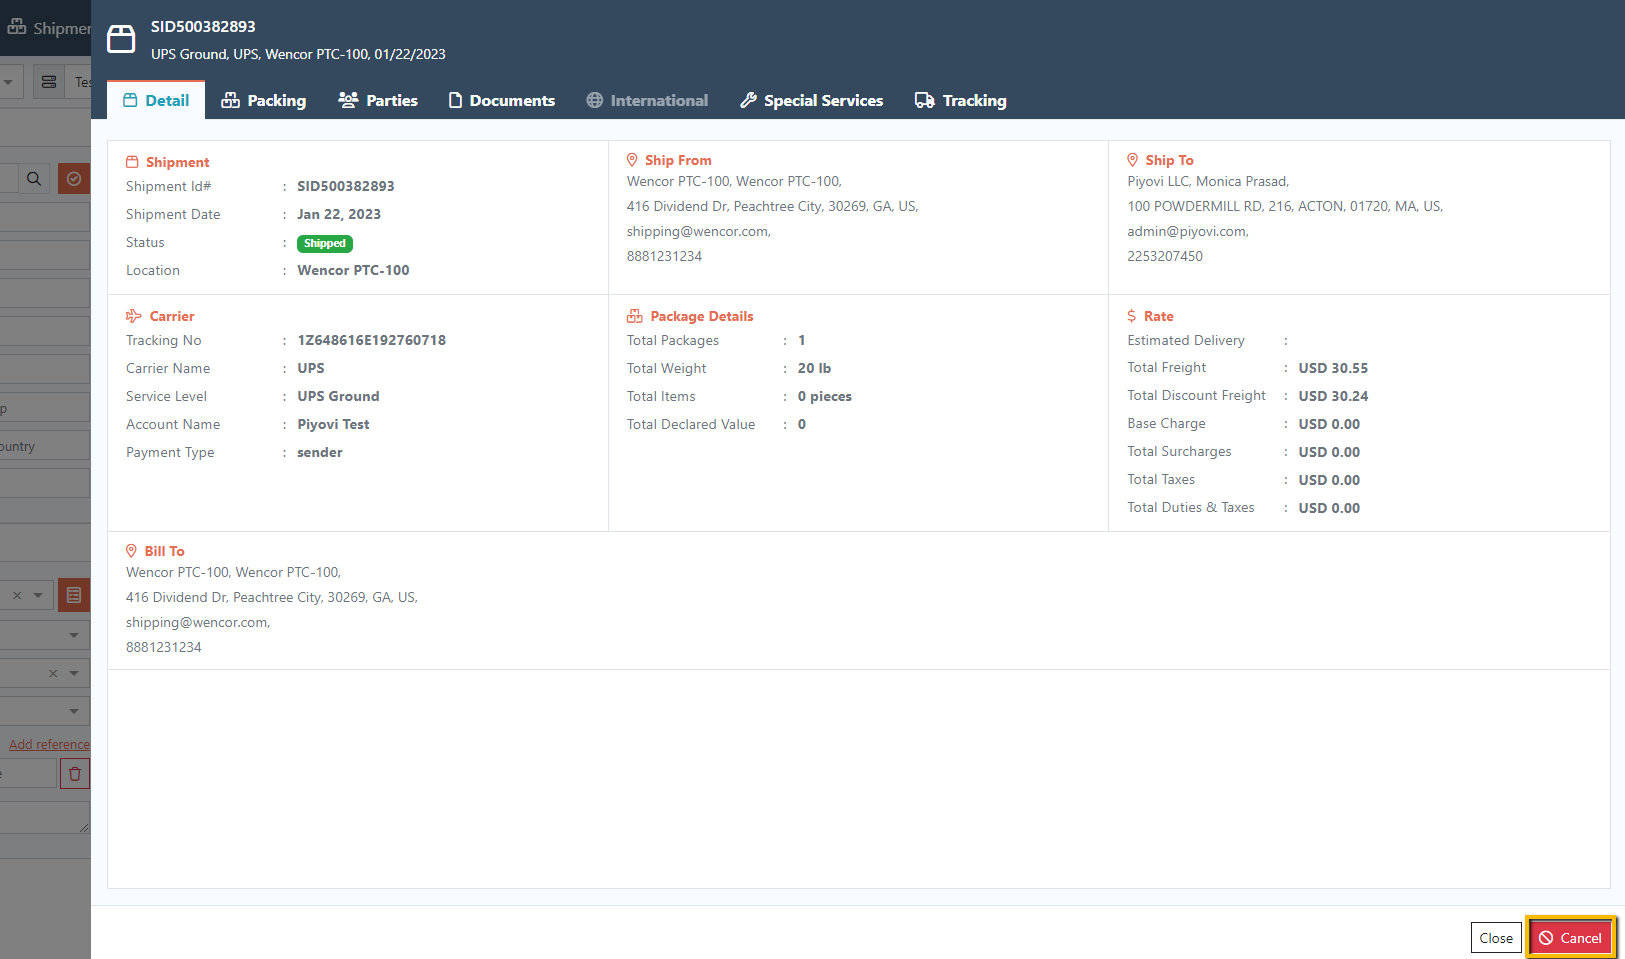
Cancel Shipment
When a shipment in Shipped status is retrieved from History, the cancel option will be available at the bottom right.
Another way to cancel a shipment is by navigating to the Shipments tab and clicking on the down arrow to view the Cancel option for any shipments in Shipped status.