Dashboards
Welcome to the user guide for utilizing the Dashboards feature within Piyovi TMS solution, tailored for both new and seasoned users. It provides essential insights into navigating, configuring, and effectively using the dashboards for data visualization and management. Key sections include enabling dashboards through permissions, personalizing dashboard layouts, and understanding data widgets. This manual is designed to help users quickly harness the full potential of our dashboard tools, facilitating a more efficient and informed user experience.
Activation and Authorization
To activate the Dashboard feature, new permissions have to be enabled.
- Login to Piyovi as a user who has the ability to manage User configuration.
- Navigate to Configuration (top menu) → User (left menu) → Role (tab).
- Click Edit next to a role that you would like to enable Dashboard capability for.

- Click Permission.\
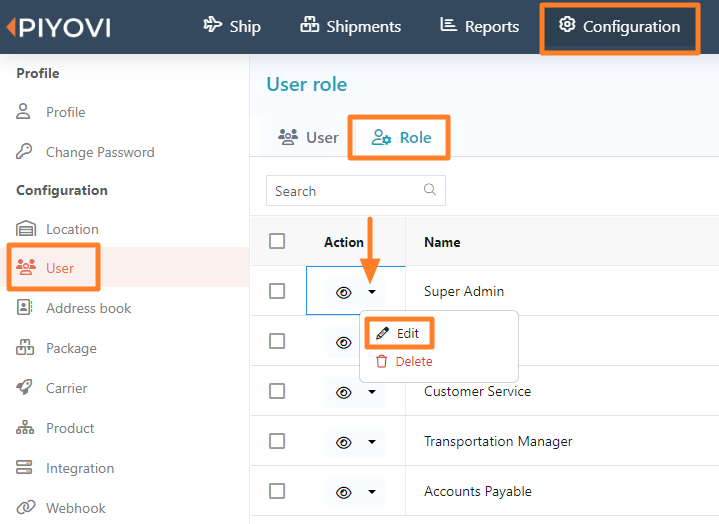
- Enable the appropriate permissions for the selected role. There are 5 new permissions related to Dashboards:
- Manage Dashboard: Activates the Dashboard option from the top menu. Users will be able to access the screen, view any Shared Dashboards that were shared with them, and create any new dashboards.
- Ability to Share Dashboard: Ability to share their dashboards with other users across their organization based on roles.
- Manage Invoice Widgets: Provides access to add Invoice related widgets.
- Manage Operational Widgets: Provides access to add Operational related widgets.
- Manage Shipment Widgets: Provides access to add Shipment related widgets.
- Repeat the process for each role by enabling the appropriate access.
Dashboard Management
Adding a Dashboard
- Navigate to Dashboard (top menu).
- The user will see either:
- a blank page with + Add Dashboard button (or)
- if there are existing dashboards that he/she has access to, then the favorite dashboard will be loaded.
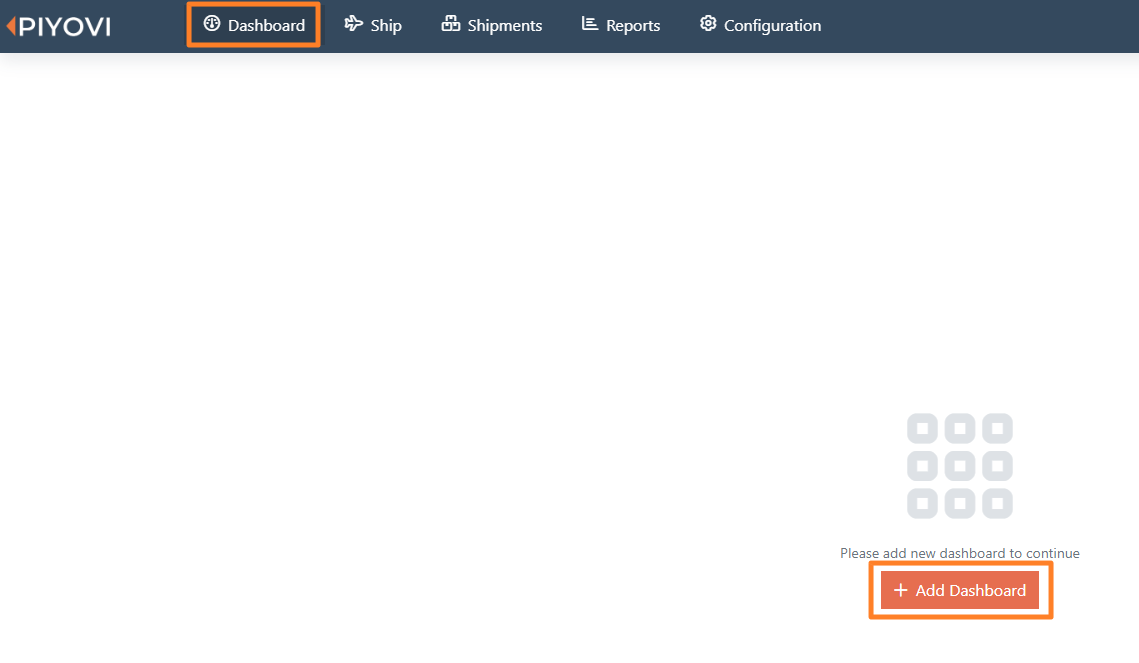
- Click + Add Dashboard.
- Enter Display Name and Description. Dashboard Type is defaulted to My dashboard and is visible only to the user creating the dashboard.
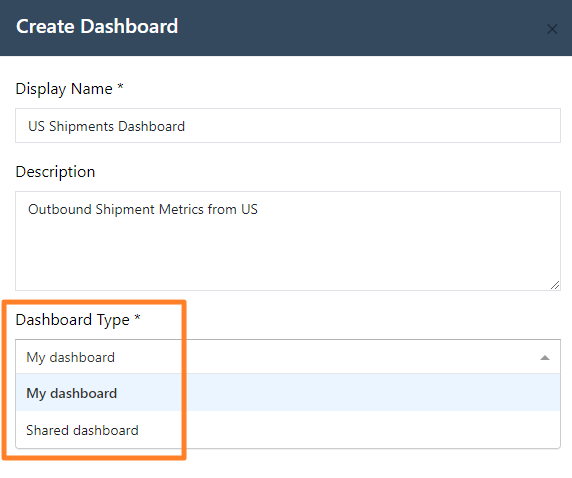
- If the user has a role with Ability to Share Dashboard permission enabled, then he/she can change the Dashboard Type to Shared Dashboard.
- Specify one or more Roles that should have access to the dashboard.
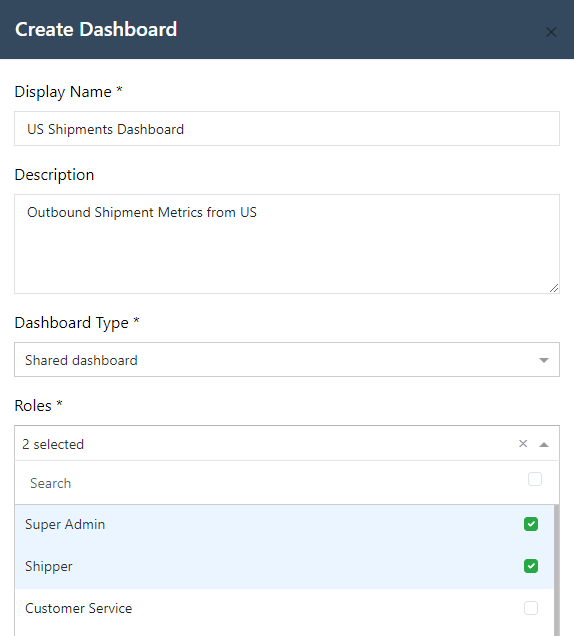
- Click Create.
Adding Widgets
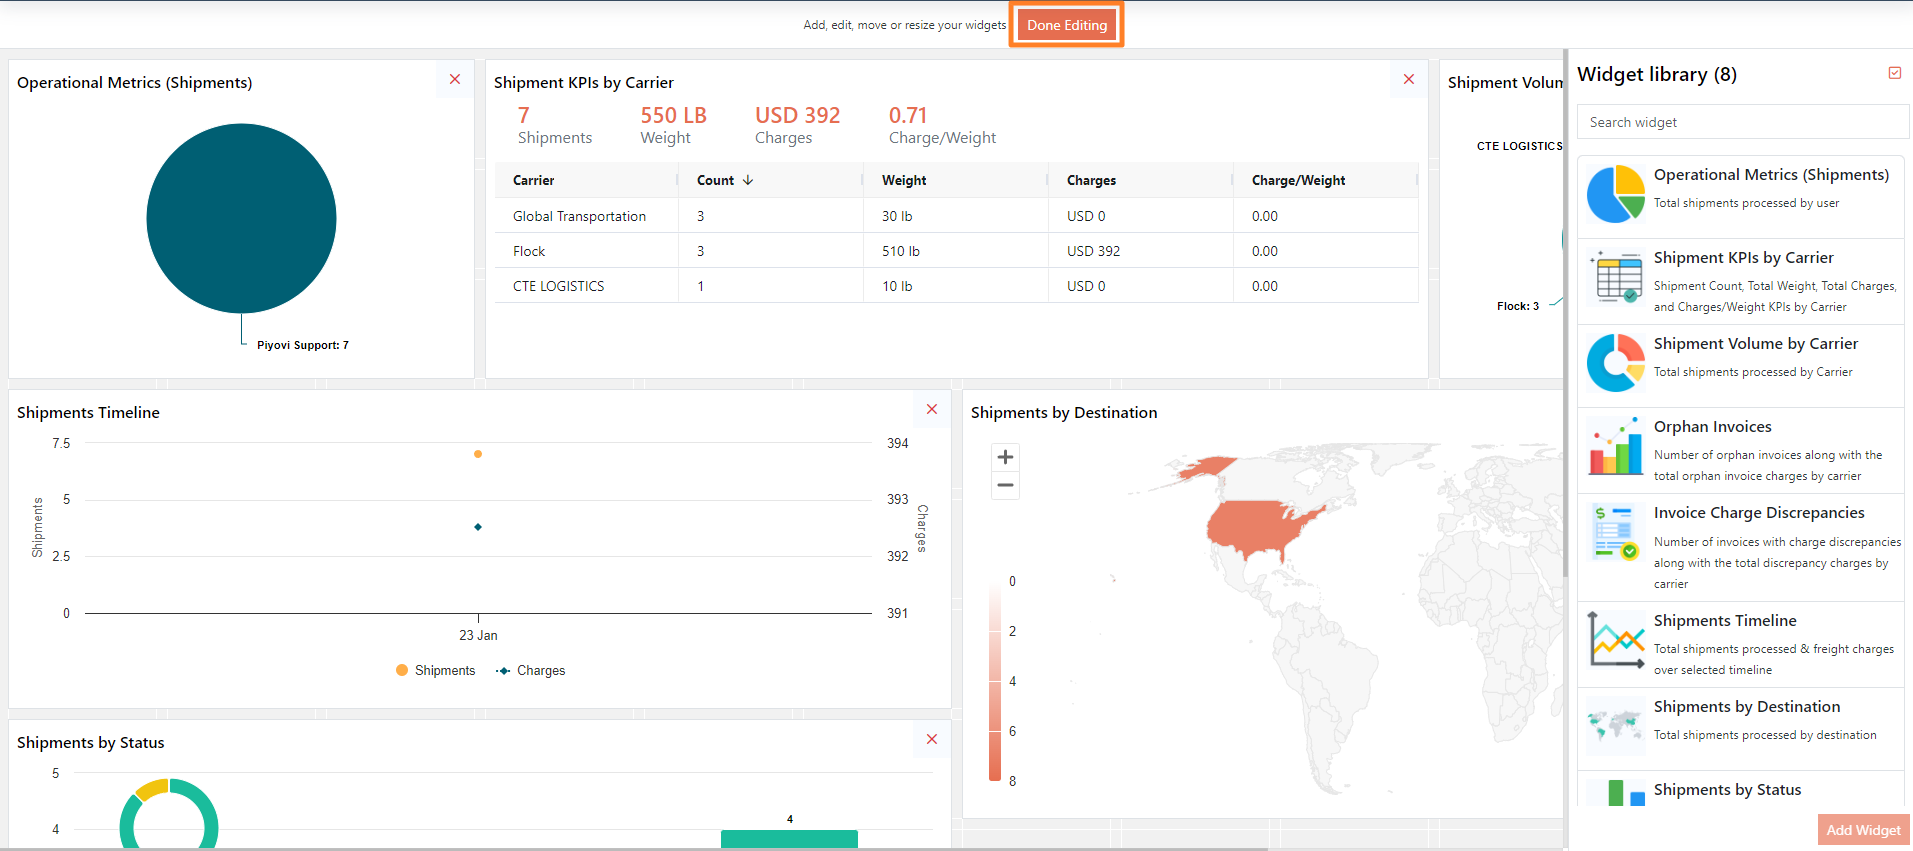
- Once a new dashboard is created, click + Add Widget.

- Select one or more widgets (or) click on the top right checkbox to select all widgets.
- Click Add Widget.
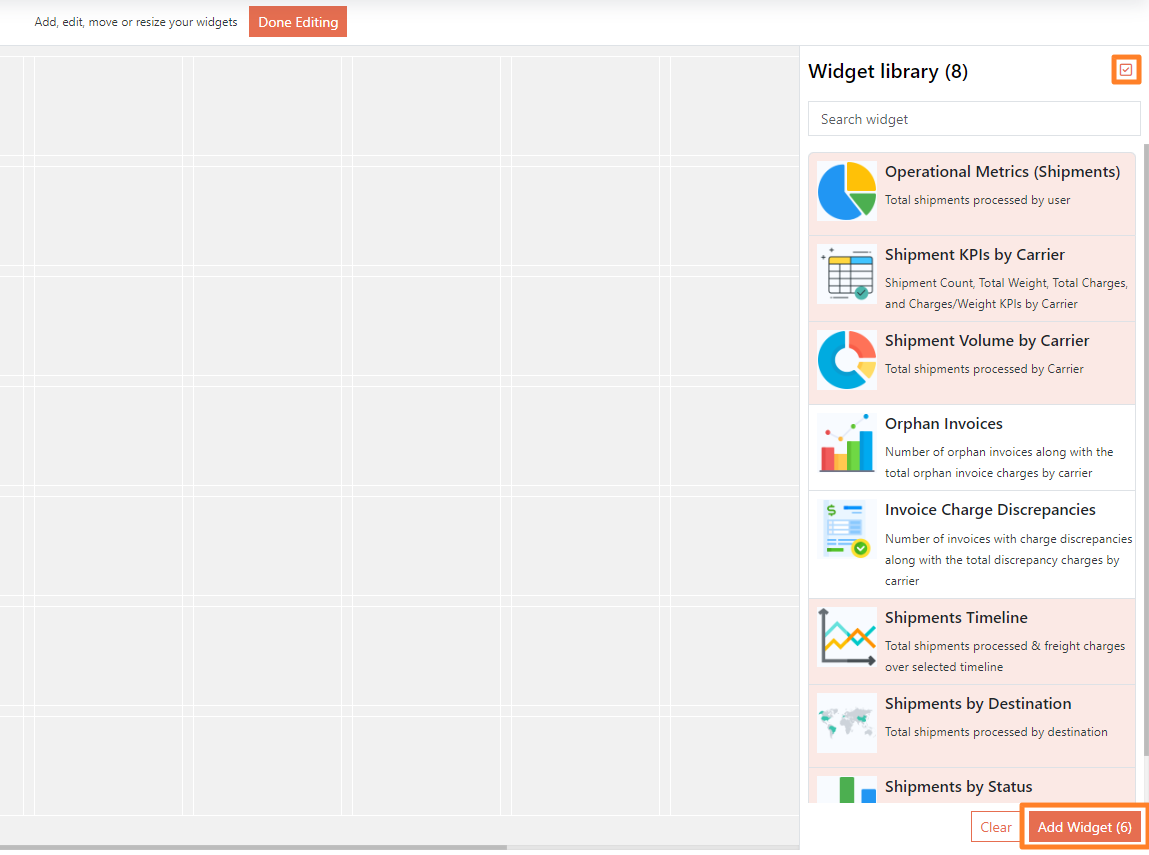
- Add more widgets (the same widget can be added multiple times), move or resize (using drag/drop), or delete a widget (click x on top right corner).
- Click Done Editing.
Widget Configuration
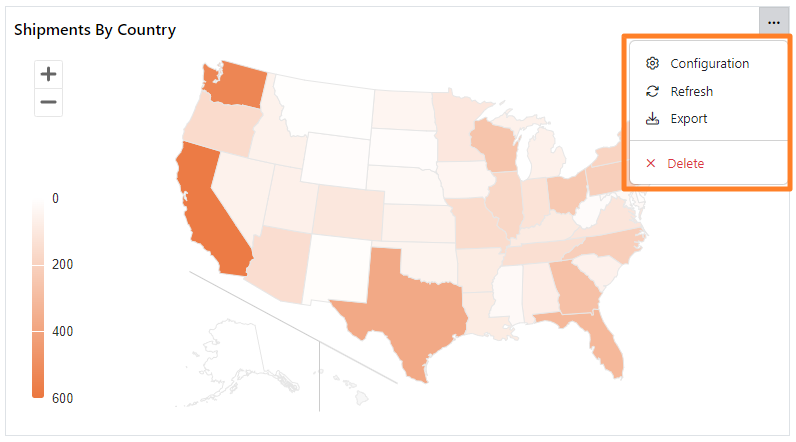
- Click … on the top right corner of any widget.
- Click Configuration.
- Each widget has certain configuration options. Update the options as required.
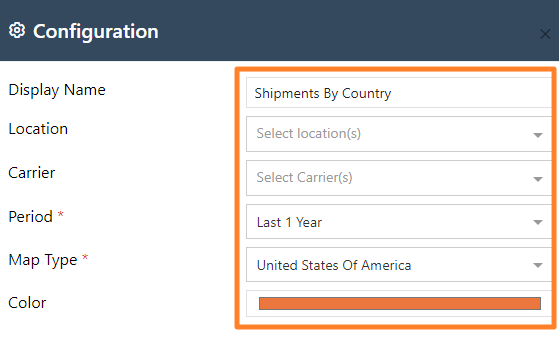
- Click Refresh to refresh the data in that widget.
- Click Export to export the widget (tabular data will be exported to excel, charts will be exported as images).
- Click Delete to remove the widget.
Dashboard Management
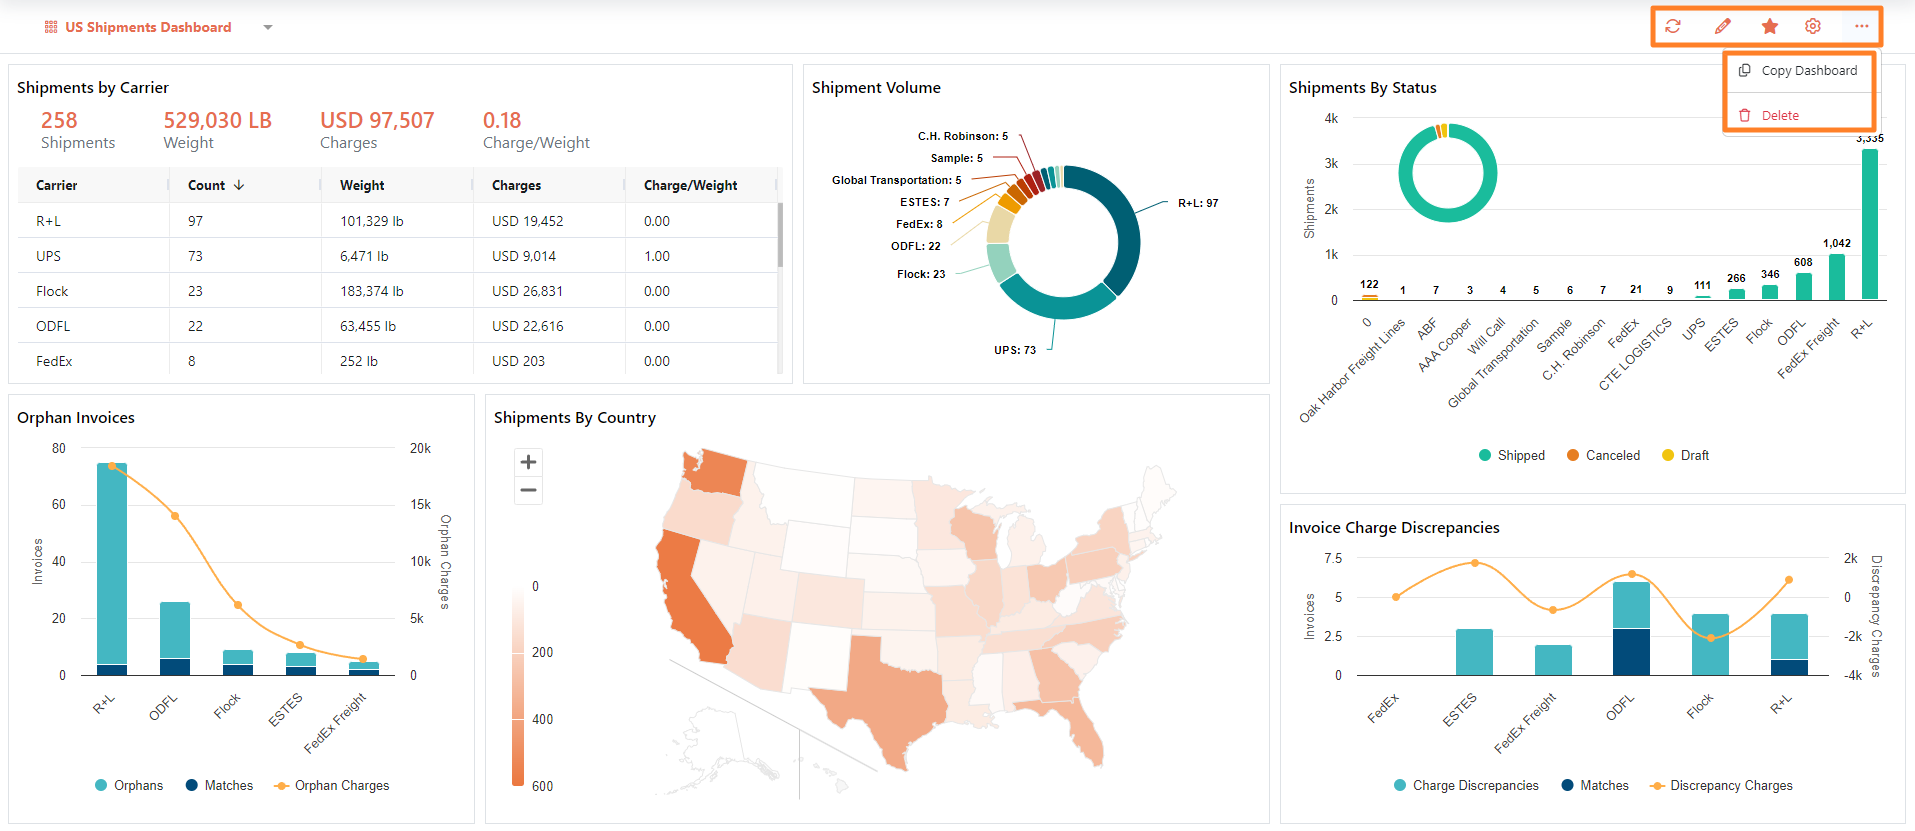
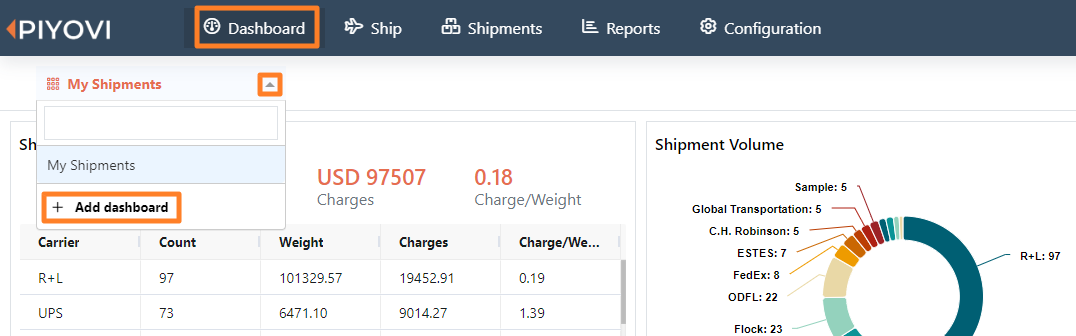
- Click Refresh (1st icon on the top right corner of a dashboard) to refresh the data in all widgets within the dashboard you are viewing.
- Click Edit (2nd icon on the top right corner of a dashboard) to re-arrange/re-size the widgets within the dashboard & add/remove widgets.
- Click Star (3rd icon on the top right corner of a dashboard) to mark the current dashboard as the Default dashboard. This will be the dashboard that will be loaded as default when you navigate to Dashboard in the top menu.
- Click Settings (4th icon on the top right corner of a dashboard) to update the display name/description and/or settings related to a shared dashboard.
- Click … on the top right corner of a dashboard to Copy Dashboard or Delete.