Reports
Shipments Report
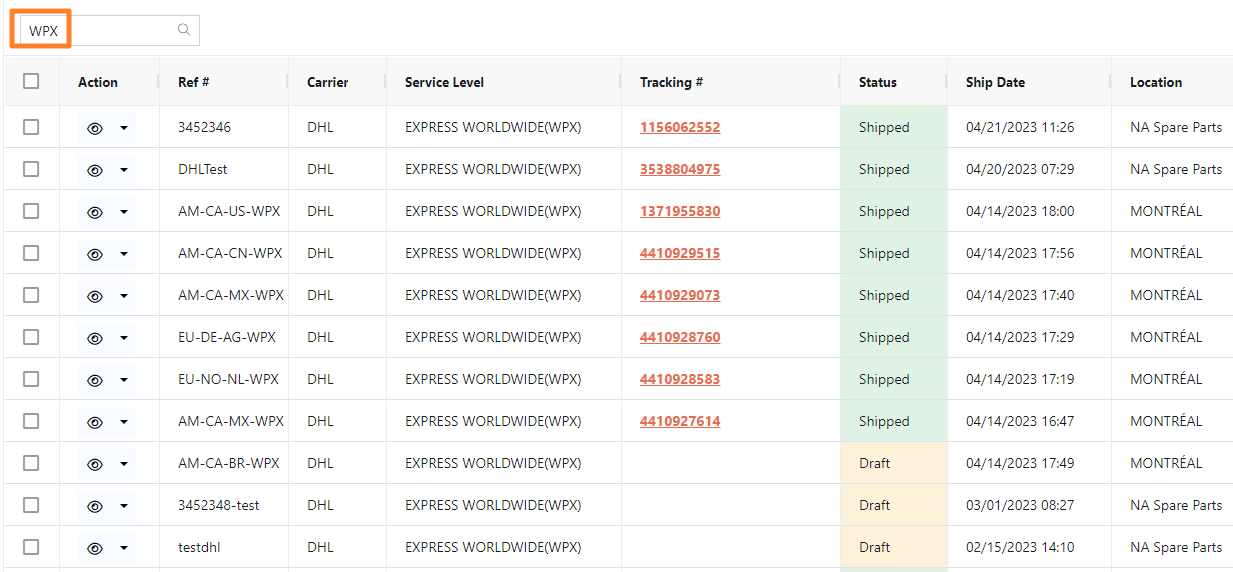
Click Shipments (top menu) to view all your shipments in all statuses.
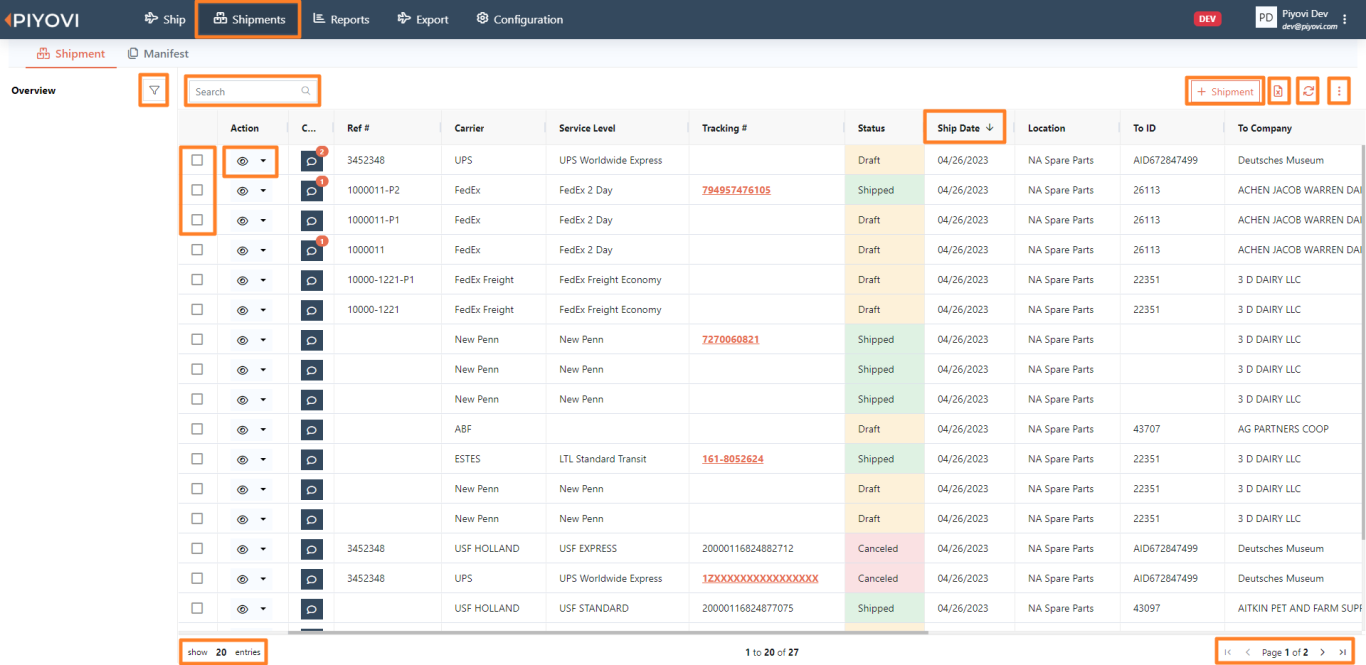
Following are key features of the report:
- Ability to search using filters and save custom reports by clicking on the Filter icon.
- Search across all key fields by typing search criteria in the top left Search field.
- Click + Shipment to create a new shipment.
- Click Excel to export the data into an Excel sheet.
- Click Refresh to reload the data in the report you are viewing.
- Click the 3 Dots to:
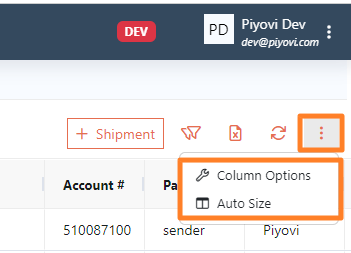
- Auto Size – the width of all columns will be adjusted based on the data automatically. This is applicable for the current report you are viewing.
- Column Options – select columns to view with preferred order and sorting.
- Click show 20 entries at the bottom left to change the number of records displayed on each page. Options are 10, 20, 50, 100, 500.
- Navigate to various pages to view more results by clicking on arrow buttons at the bottom right.
- The shipments will be sorted by Ship Date by default.
- Click the View (eye) icon to view the shipment details.
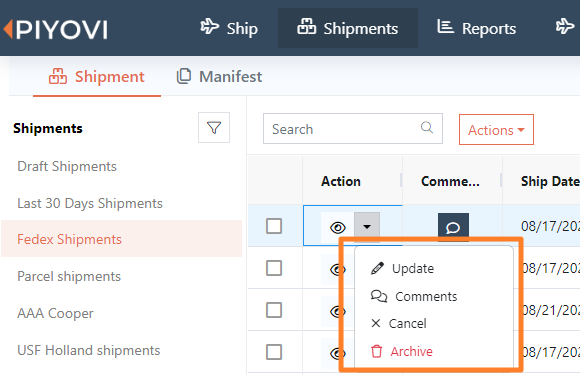
- Click the down arrow next to the View icon for additional options:
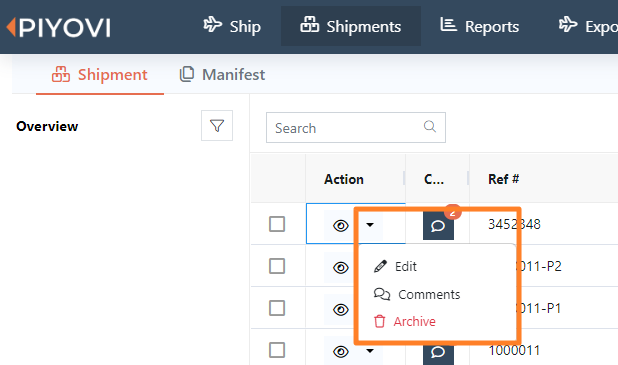
- For Draft shipments, the Edit option will be available to continue working on the shipment.
- For Shipped shipments, the Update and Cancel options will be available.
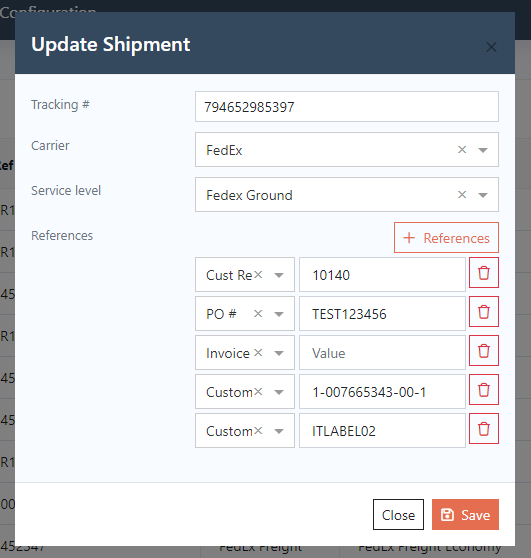
- Click Update to update the following fields:
- Tracking #
- Carrier
- Service Level
- Any references (references can also be added).
- Click Update to update the following fields:
- For Shipped shipments, the Update and Cancel options will be available.
- For shipments in any status:
- Click Archive to remove it from all views.
- Click Comments to view any existing comments & add any additional comments. Note that once a comment is saved, it cannot be edited.
- If you add the Comments field as a column, the comments icon will display the number of comments that have been saved against that shipment so far.
- Select one or more shipments by clicking on the checkboxes to enable the Actions button to perform additional functions:
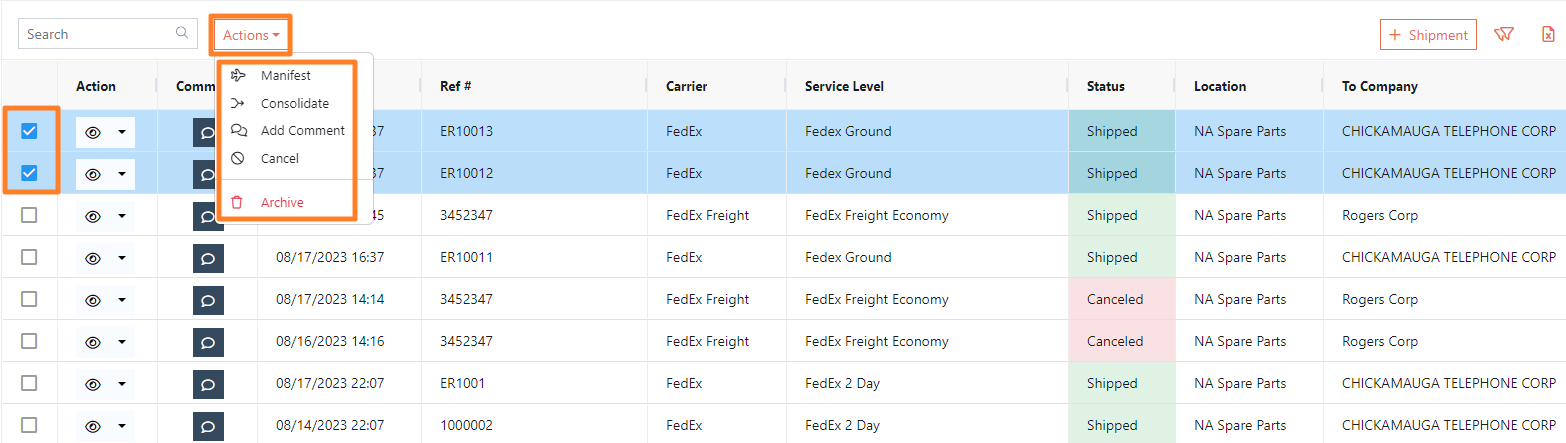
- Click Manifest to manifest shipments.
- Click Consolidate to consolidate shipments. This action will result in the following:
- Piyovi will check if all the selected shipments are in Draft status and the Ship To Address matches. If there is a mismatch, consolidation will fail.
- If the checks pass, Piyovi will:
- Create a new shipment with:
- All header data from the first shipment.
- All items from all shipments will be consolidated.
- All packing units from all shipments will be consolidated.
- The primary reference # (e.g., delivery, order, etc.) and all the reference fields data will be concatenated using as the delimiter.
- The existing shipments will be canceled.
- Create a new shipment with:
- Click Add Comment to add a comment to all the selected shipments.
- Click Cancel to cancel all the selected shipments.
- Click Archive to archive all the selected shipments.
Column Options
- Select the Sorting tab on the top left for configuring the sorting in the report:
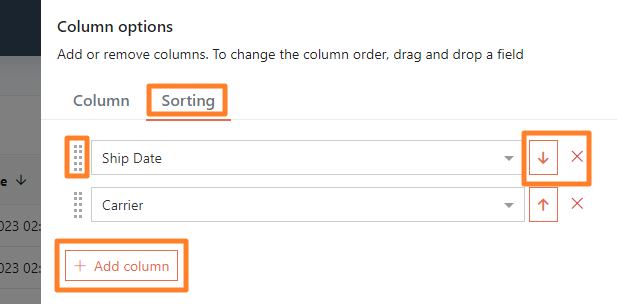
- Click + Add column and select from available fields to use it as a sorting field.
- Click the arrow icon to specify ascending (up arrow) or descending (down arrow) sort for that column.
- Click x to remove a column from sorting.
- Select a field by clicking on the dots on the left of each field and drag it up or down to alter the order of sorting.
- Select the Column tab on the top left for configuring the columns in the report:
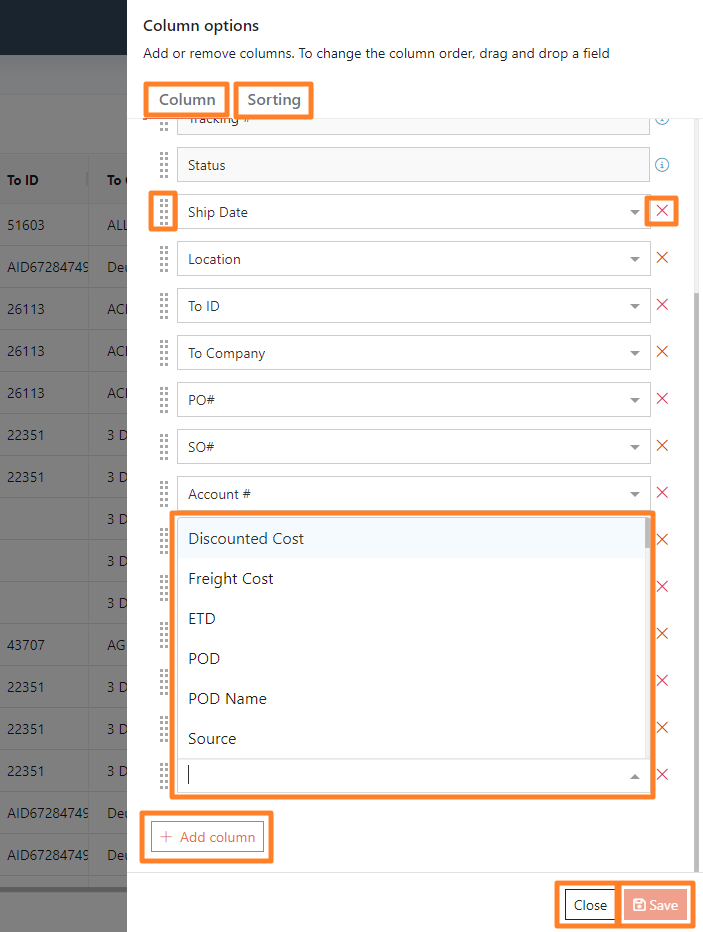
- Click + Add column and select from available fields and add a new column.
- Click x to remove a column.
- Select a field by clicking on the dots on the left of each field and drag it up or down to alter the column position on the report.
- Click Save to save all changes.
- Click Cancel to keep the report as-is without making any changes.
Searching & Filtering
There are various options to search/filter to find the shipment(s) in this report:
- Search across all key fields by typing search criteria in the top left Search field. The key fields are:
- Shipment ID
- Carrier
- Service Level
- Status
- To Company
- To ID
- Payment Type
- Location
- PO #
- SO #
- Invoice #
- Cust Ref #
- Ref #
- Click the Filter icon to run/save report(s) with additional search/filter criteria.
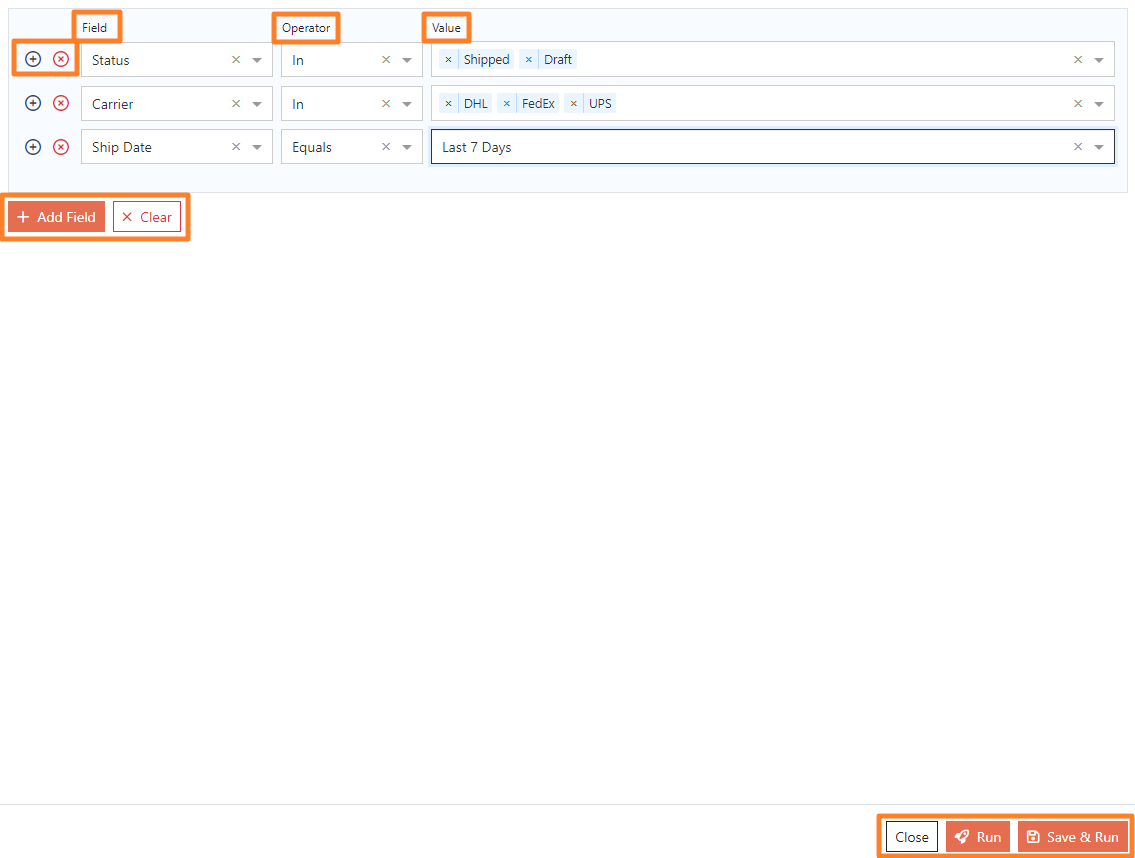
- Click + or + Add Field to add a new field as a filter:
- Choose the desired Field and Operator.
- Provide Value(s) – depending on the field and the operator, you can provide either one or more values. Some fields require free text value and some require a selection from a predefined list of values.
- Click x to remove a field as a filter.
- Click x Clear to clear all filters.
- Click Close to ignore all changes.
- Click Run to run the report once with the selected filters.
- Click Save & Run to save the filters as a custom report by providing a Name. All saved reports will be available on the left-hand menu.
- Click the 3 Dots next to any of the saved reports:
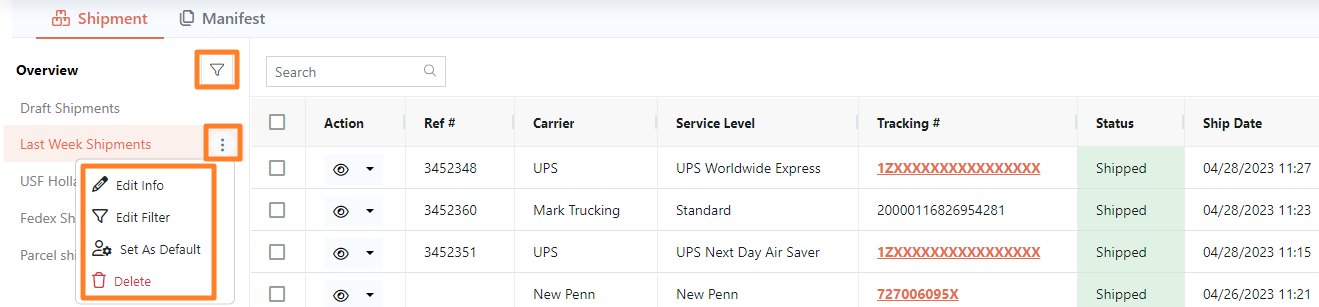
- Click Edit Info to change the name of the report.
- Click Edit Filter to add/edit/remove any of the existing saved filters.
- Click Set As Default to set the report as the default report to be loaded when you click Shipments on the top header menu.
- Click Delete to remove the report.
Manifest
For the majority of the carriers, an EOD process or generation of a manifest is not necessary. If a carrier requires transmitting end of the day data and/or a manifest needs to be generated for the internal process, then you can manifest your shipments.
- Select one or more shipments and click Actions → Manifest.
- If shipments from multiple carriers are selected, multiple manifests will be created.
- If a carrier requires manifest data to be sent electronically, that data will be transmitted.
- Ensure that all selected shipments are in Shipped status.
- Click Manifest to view created manifests:
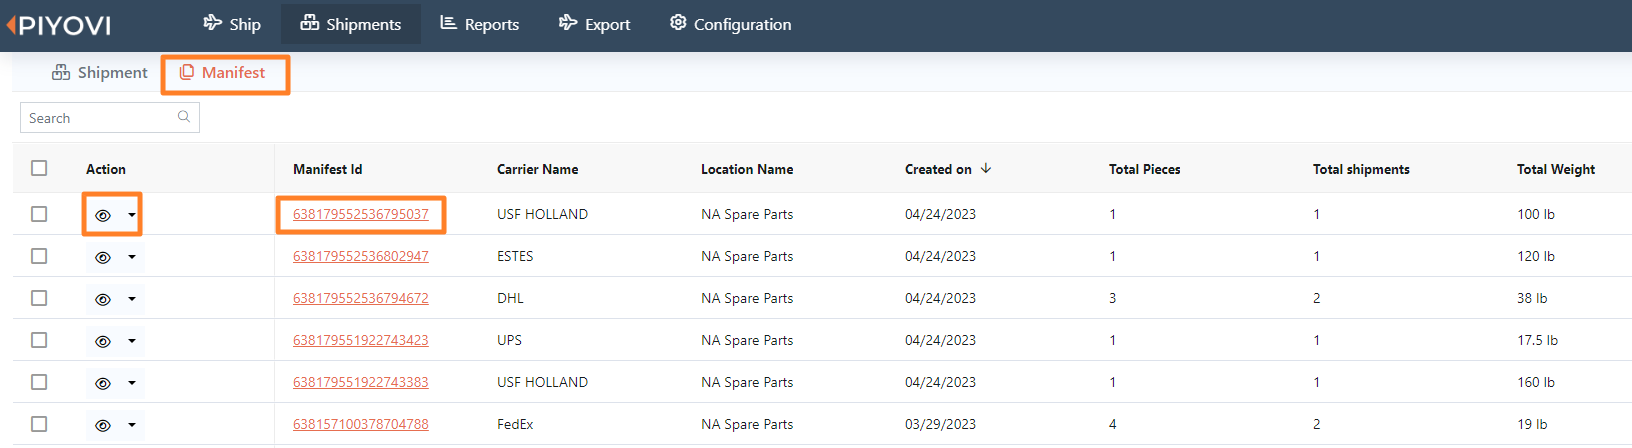
- Click the View (eye) icon or the Manifest ID to view the generated manifest document.
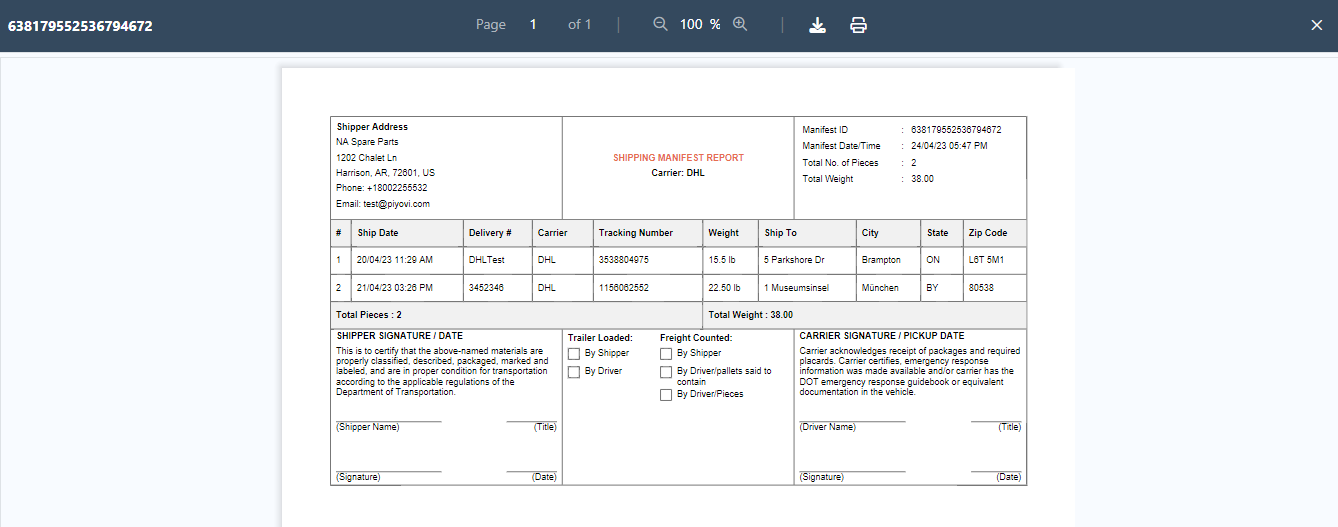
- Click the down arrow next to the View icon and click Delete to delete a manifest.
Operational Metrics
This report focuses on evaluating the productivity of shippers within Piyovi. By tracking and analyzing key metrics related to shipper performance, businesses can gain insights into the efficiency and effectiveness of their shipping operations.
This report will consider all shipments processed by the users irrespective of their current status – shipped/cancelled. The idea being that if a user has shipped it, then they have done the work. You can also see metrics for canceled shipments (or any other statuses that you are using within your operations).
- Navigate to Reports (top menu) → Shipments (left menu – under Operational Metrics).
- You can filter based on the following parameters:
- Status
- Period
- Location (multi-select)
- User Name (multi-select)
- Select the appropriate values for the filters and click the Search icon.
- The results will be displayed with the following metrics by User Name & also totals (Summary):
- Shipments
- Shipments (Int) – International shipments
- Packages
- Weight
- Line Items
- Click Excel to export the data into an Excel sheet.

Tracking
Along with the ability to track all shipments through the Shipments (top menu) report, there are additional reports to help you access Delivered Shipments along with POD data (when available) and Delayed Shipments that missed the Estimated Time of Delivery (ETD) mark.
Navigate to Reports (top menu) → Delivered Shipments (left menu – under Tracking) to view all delivered shipments & Delayed Shipments to view only the delayed shipments. The following features are available:
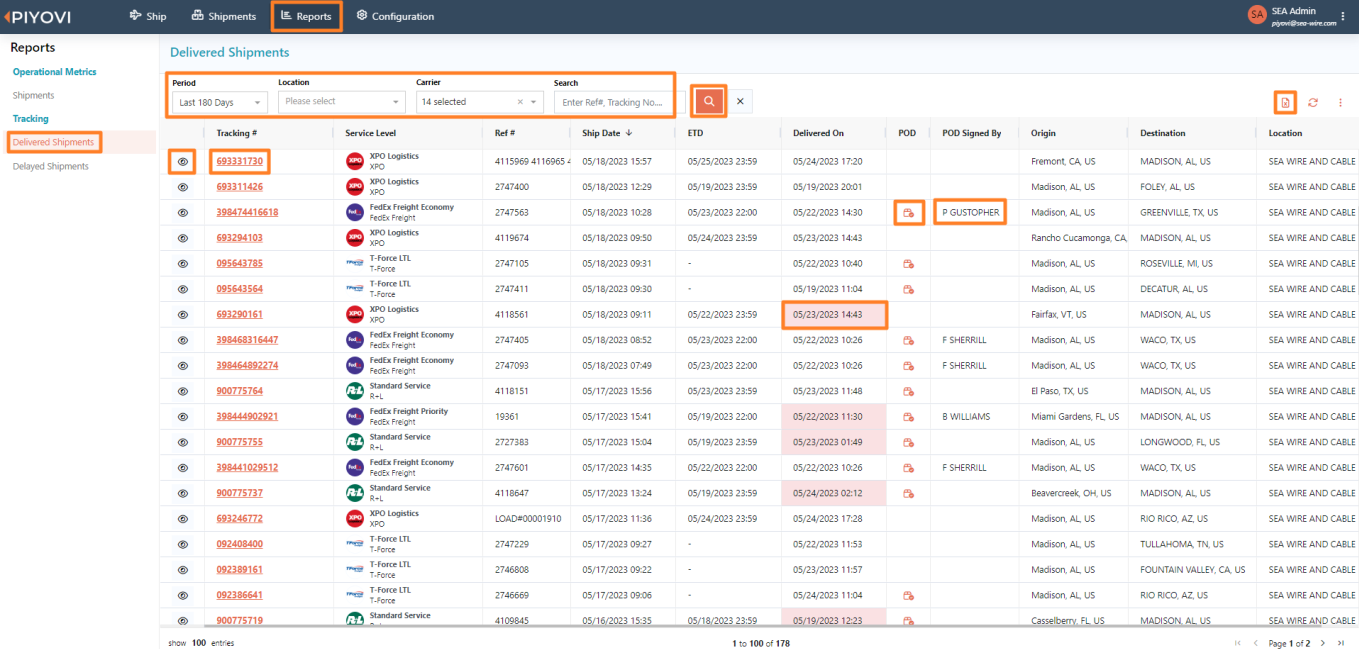
- You can filter based on the following parameters:
- Period
- Location (multi-select).
- Carrier (multi-select).
- Key Data Search using reference numbers, tracking numbers, etc.
- Select the appropriate values for the filters and click the Search icon.
- The results will be displayed with the following key data points:
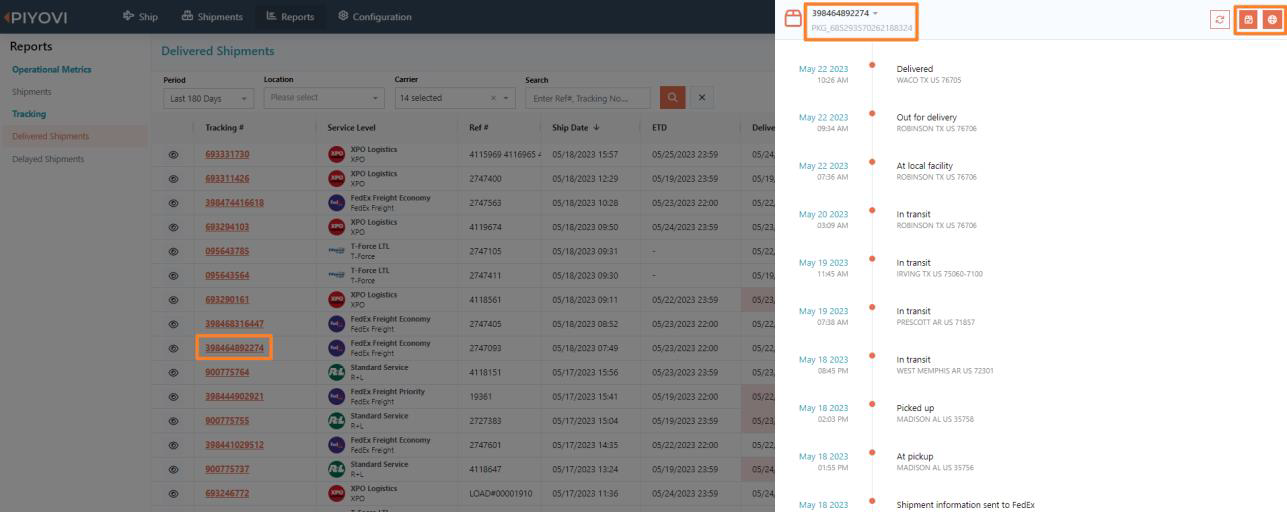
- Tracking # - click this to view detailed milestone data for the shipment.
- Click Document (2nd icon - top right) to view the POD document when available.
- Click World (3rd icon – top right) to navigate to the carrier website for tracking this shipment.
- If it is a parcel shipment with multiple packages, then select an alternate package to see relevant milestones.
- Delivered On – this will be highlighted in red if greater than ETD signifying a delayed shipment.
- POD – a link to the POD document when available.
- POD Signed By – name of the person who signed at delivery when available.
- Click the View (eye) icon to view the shipment details.
- Click Excel to export the data into an Excel sheet.
- Click the 3 Dots (top right) → Auto Size to automatically adjust the width of the columns based on the data.