25.07.01
Introduction
We are pleased to announce the release of Piyovi v25.07.01, which includes key enhancements aimed at improving usability, operational efficiency, and shipment visibility. Below is a summary of the new features and updates included in this release.
1. Bulk Milestone Import in Shipments
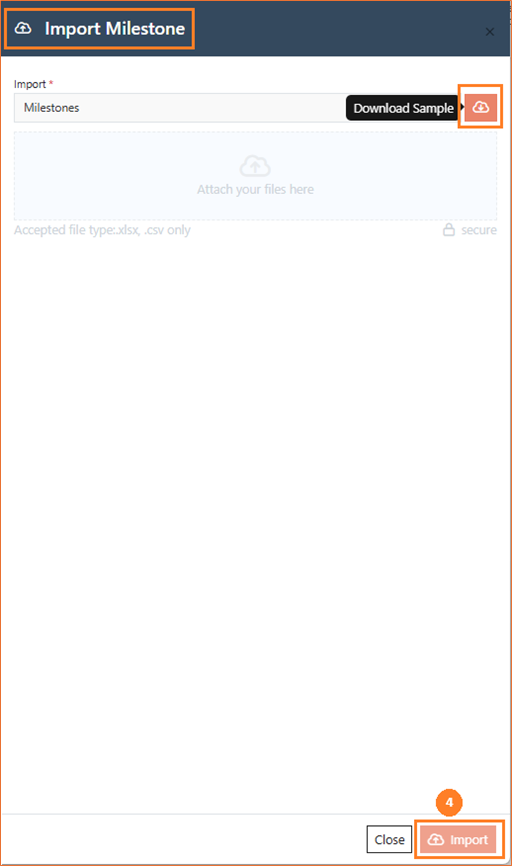
Users can now bulk upload shipment milestone data using .xlsx or .csv files through the Import Milestones option in the Shipments screen. This reduces manual data entry and streamlines milestone updates for multiple shipments.
Steps to Use
-
Navigate to the Shipments tab.
-
Click the three-dot menu on the top-right corner of the shipment grid.
-
Select Import Milestones from the dropdown menu.

-
In the popup, attach your milestone file and click Import.
Sample Template
To ensure correct formatting, users can download a pre-defined sample file from the import popup. This template includes the required structure and columns for milestone data.
-
Accepted file types:
.xlsx,.csv -
Download and refer to the sample file for proper formatting.
2. Dashboard Widget – Shipments Delivery Metrics
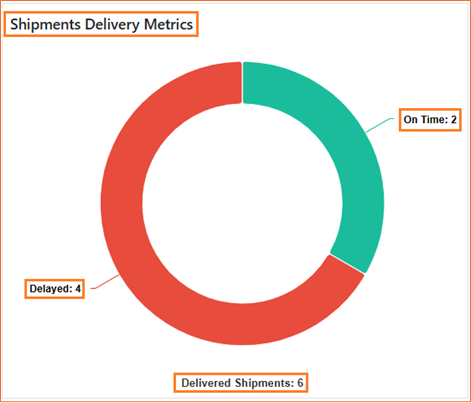
A new widget has been added to the Dashboard to monitor delivery performance, allowing users to quickly assess shipment efficiency.
Key Highlights
-
Displays the total number of delivered shipments
-
Breaks down deliveries into:
-
On-Time
-
Delayed
-
-
Provides a clear donut chart visualization for quick insights
Widget Features
-
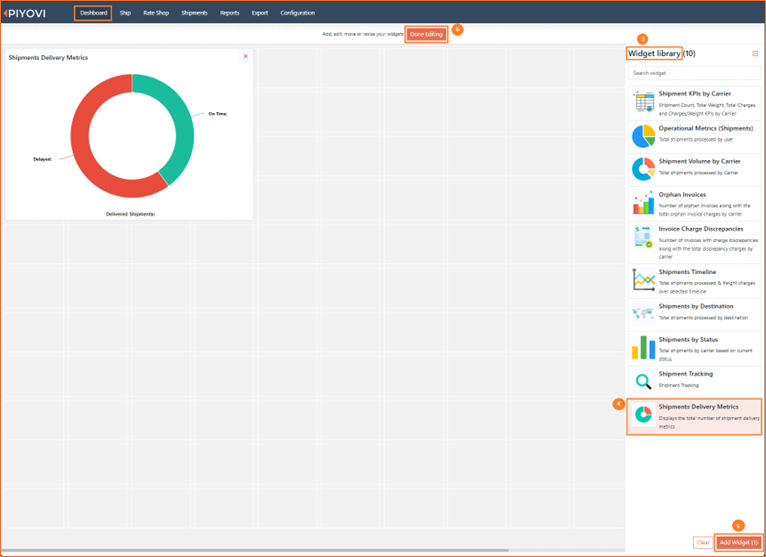
Can be added from the Widget Library on the Dashboard
-
Fully configurable:
-
Location: View shipment metrics for selected locations
-
Carrier: View shipment metrics for selected carriers
-
Period: Filter data for specific time periods (e.g., last 30 days, last year)
-
-
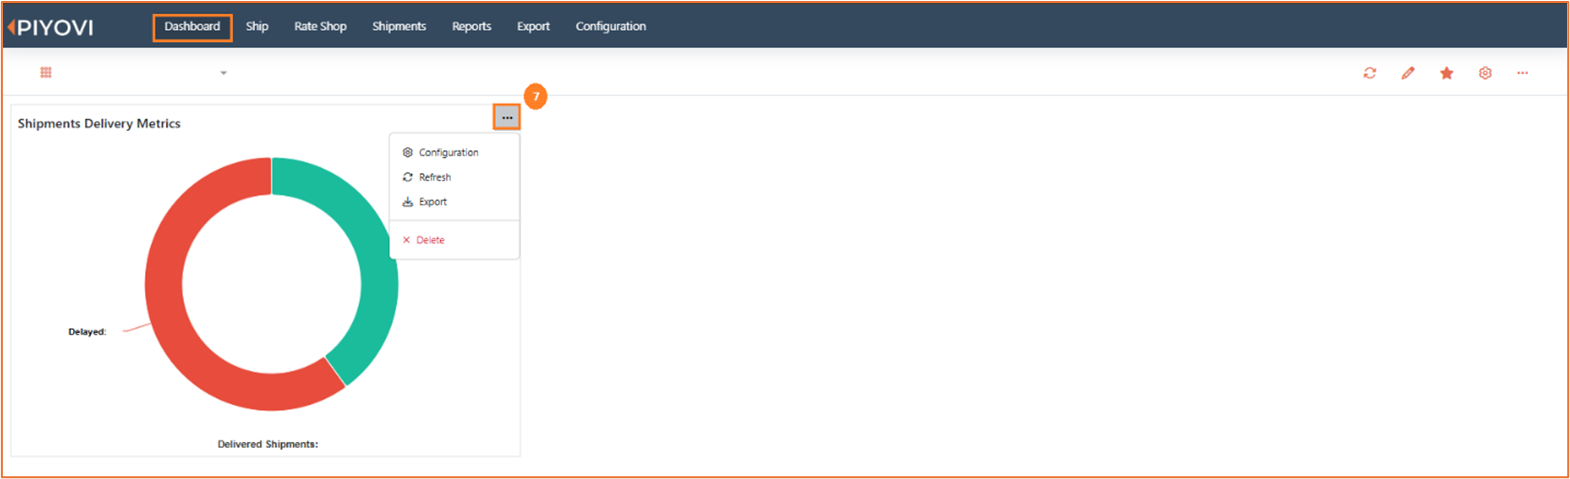
Options to Configure, Refresh, Export, or Delete the widget
How to Access
-
Go to the Dashboard
-
Click the Edit icon on the top right to enter editing mode.

-
Once in edit mode, the Widget Library panel will appear on the right.
-
Search for Shipments Delivery Metrics.
-
Click Add Widget to place it on your dashboard.
-
Click Done Editing.
-
Use the three-dot menu on the widget to configure or export as needed.
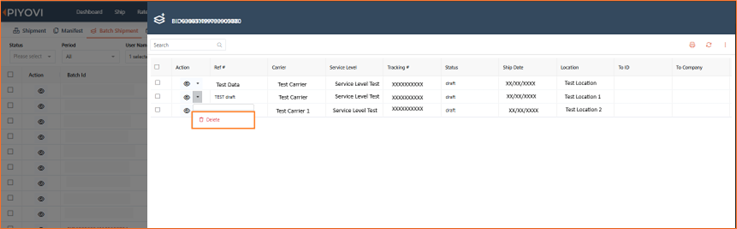
3. Batch Shipment – Remove Shipment from Batch
We have enhanced the Batch Shipment module that allows users to remove individual shipments from a batch after it has been created. This feature applies only to batches that are in Created or Error status and gives users better control and flexibility in managing their shipment groups. This update includes validation and logging to ensure data consistency and auditability throughout the process.
To remove a shipment from a batch, follow the instructions
-
Go to Batch Shipment
-
Click on a batch with status Created or Error
-
Locate the shipment in the list
-
Click the Action dropdown and select Delete
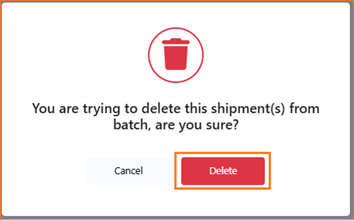
Once deleted:
-
The shipment’s BatchId will be cleared.
-
The shipment will be removed from the batch's internal list.
-
The batch’s Shipment Count will be updated accordingly.
-
A comment will be added to the shipment: “Removed from batch”.
Note: Shipments with status "Shipped" cannot be removed from a batch.
Important: A batch must contain at least 2 shipments at all times.
For example, if a batch contains 3 shipments, only 1 can be removed. The system will not allow removal of 2 or more shipments that would bring the count below the minimum required.
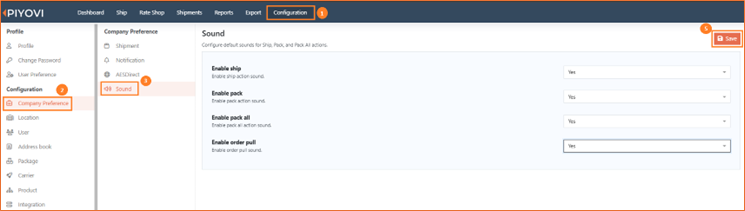
4. Shipment Action Sounds
We have introduced a new feature that allows users to configure sound notifications for key shipment operations: Order Pull, Pack, Pack All, and Ship. This feature is designed to provide audio feedback for key actions and minimize manual oversight during repetitive tasks. Each action sound is configurable and can be enabled or disabled based on company preference.
To configure shipment sounds, follow the instructions
-
Navigate to the Configuration menu from the top navigation bar.
-
Click on Company Preference from the left panel.
-
Select the Sound tab.
-
Use the dropdowns to configure the following:
-
Enable ship – Enable or disable sound when shipment is marked as shipped.
-
Enable pack – Enable or disable sound when an item is packed.
-
Enable pack all – Enable or disable sound when all items are packed together.
-
Enable order pull – Enable or disable sound when an order is pulled from ERP.
-
-
Click Save to apply the changes.
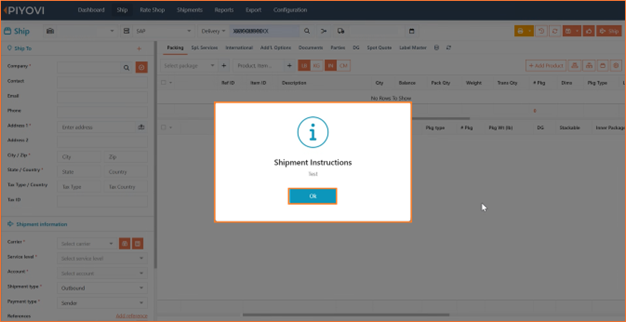
5. Order Pull Notification for End Users
We have introduced a new notification enhancement to improve user awareness and communication during ERP-based order pulling. When an order is pulled from the ERP system (via Source), the system will now display a pop-up notification to the end user containing the instructions or message returned by the ERP system..
Functionality
-
When an order is pulled from the ERP source, a pop-up message is triggered.
-
The message contains the exact text sent from the ERP system.
-
The pop-up includes an OK button, which the user must click to proceed.
-
This ensures the user acknowledges the information every time an order is pulled from ERP.
Note
The pop-up notification will appear only if the ERP system provides any instructions or message for the order.
If there are no instructions returned by the ERP, the pop-up will not be displayed. This ensures users are prompted only when relevant guidance is available from the ERP system, avoiding unnecessary interruptions.
6. 2D Barcode Scanning
We have enhanced the barcode scanning functionality in the Ship screen to support 2D barcode formats. This enhancement allows users to scan a barcode containing Item ID, Quantity, and Serial Numbers, and automatically bind the data to the selected package. This feature significantly improves the speed and accuracy of the packing process by reducing manual data entry and ensuring serial number validations are enforced.
Existing Functionality
Previously, the system only supported scanning 1D barcodes containing Item ID.
When scanned, the Item ID would be matched against the product list and bound to the selected package.
New Functionality
The system now supports scanning 2D barcode data with the following format: Item ID, Quantity, Serial Number 1, Serial Number 2, …
To enable 2D scanning, a new toggle Multi Dimension Scan has been added under the Print/Scale Config section.
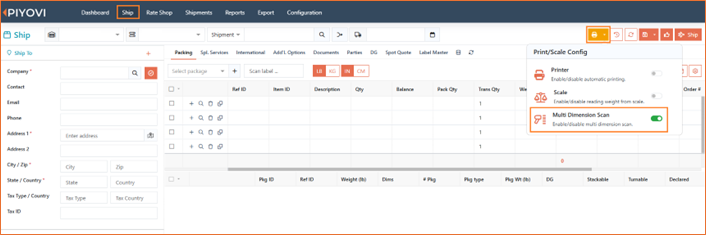
To scan a 2D barcode, follow the instructions
- Navigate to the Ship screen.
- Click on the Print/Scale Config icon (printer icon) at the top.
- Enable the toggle for Multi Dimension Scan.
- Add a package and ensure it is selected.
- Scan the 2D barcode using your barcode scanner.
- The system will automatically bind the scanned Item ID, Quantity, and Serial Numbers to the selected package.
Validations
-
The scanned Item ID must exist in the item grid.
-
Serial Numbers must be unique for the same Item ID within a package.
-
Duplicate serial numbers for the same Item ID are not allowed.
7. Location-Based Restrictions for Admin Screens
We have extended the “Limit by Location” functionality to all relevant admin modules. With this enhancement, users can now only view and manage data associated with their assigned locations. This update provides improved control over sensitive data, ensures consistency across modules, and aligns with location-based permission structures. This feature helps organizations maintain accurate and secure records by restricting users from accessing data that falls outside their operational scope.
Affected Screens
* Packages
* Products
* Address Book
* Carrier Management
* Rules
Key Functionality
* Users can view, add, and edit data only for their assigned locations.
* Users cannot access or modify records from locations they are not assigned to.
* This restriction is consistently enforced across all supported admin screens.
* No additional configuration is required for users who already have locations assigned through user settings.
8. Shipping Document Restriction by Location
We have enhanced the shipping document configuration to support location-based restrictions in addition to existing carrier-based rules. This enhancement brings greater flexibility and control to document generation, especially for customers operating across multiple warehouses or client-specific processes.
Functionality
- Document restrictions can now be applied using rules that support:
-
Carrier-specific documents
-
Generic documents
-
Location-based access control
-
- The system evaluates the rules at the time of shipment and only displays the relevant documents based on:
-
The selected carrier
-
The user’s location access
-
- Users will only see and be able to generate shipping documents that are valid for their location and the current carrier context.
9. Delivery Number Restriction per Integration – Draft Shipments
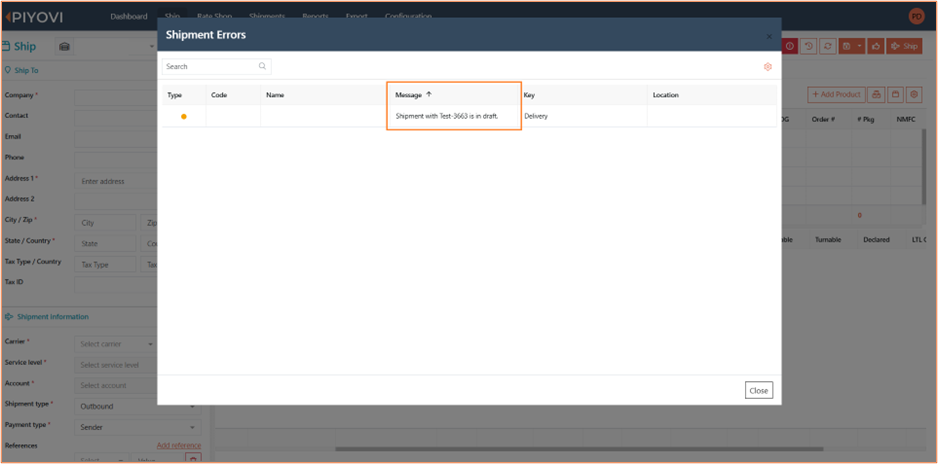
We have introduced a new system validation to prevent the creation of multiple draft shipments using the same Delivery Number within the same integration. This enhancement ensures data consistency and eliminates confusion during delivery lookups.
Previously, users were able to create more than one draft with the same Delivery Number under a single integration source. However, the system would retrieve only the latest draft when fetching delivery data, resulting in inconsistencies.
Updated Functionality
-
The system now restricts users from creating multiple drafts with the same Delivery Number in the same integration.
-
If a draft already exists for a given Delivery Number and integration, users will receive a warning message, and the system will block the duplicate draft.
-
This validation ensures that only one active draft exists per Delivery Number within any given integration, preserving the integrity of shipment data.