25.05.01
Introduction
We rolled out a patch for our shipping software – PIYOVI version v25.05.01. Below, you will find the release topic and details.
1. Auto-Update Past Ship Dates in Batch Shipment
We have enhanced the batch shipment processing logic to automatically adjust the Ship Date and Pickup Date when past-dated shipments are included in an uploaded batch file. This improvement ensures that past dates are automatically updated to the current date, eliminating the need for manual corrections.
Enhancement Details
Previously, if any shipment in the batch had a past-dated Ship Date, the entire batch processing would fail, requiring users to manually update the dates and re-uploading the file. With this update:
-
Ship Date and Pickup Date will automatically be adjusted to the current system date during batch upload if they are in the past.
-
Batch processing will no longer fail due to outdated shipment dates.
2. Read-Only Quantity Field in Items Grid for ERP Shipments
We have introduced control over the Quantity field in the Items Grid during shipment processing. This ensures that when shipment data is pulled from an ERP system, the quantity remains read-only based on a new field access control setting.
Enhancement Details
A new permission option Manage Shipment Field Access Control has been implemented to control whether users can edit the quantity field based on the source of the shipment.
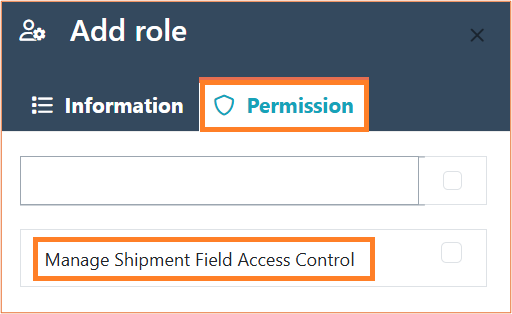
2.1 UI Behavior
- When Manage Shipment Field Access Control = YES
-
ERP Shipments: The Integration Details and Quantity fields are read-only (disabled).
-
Manual Shipments: Fields remain editable. Quantity can be modified after clearing values at the packing level.
-
- When Manage Shipment Field Access Control = NO
- No restrictions. All fields are fully editable for both ERP and manual shipments.
2.2 Headless Behavior
- When Manage Shipment Field Access Control = YES
-
ERP Shipments: Fields are read-only when saved with ERP integration.
-
Manual Shipments: Shipments created from the UI (Piyovi) behave like ERP shipments with read-only fields.
-
- When Manage Shipment Field Access Control = NO
-
No restrictions apply. All fields are editable, regardless of shipment source.
-
This feature provides granular control over editable fields during shipment processing, ensuring ERP-synced data cannot be unintentionally modified, while retaining flexibility for manually created shipments when needed.
3. International Section – Disable Total Customs Value Field
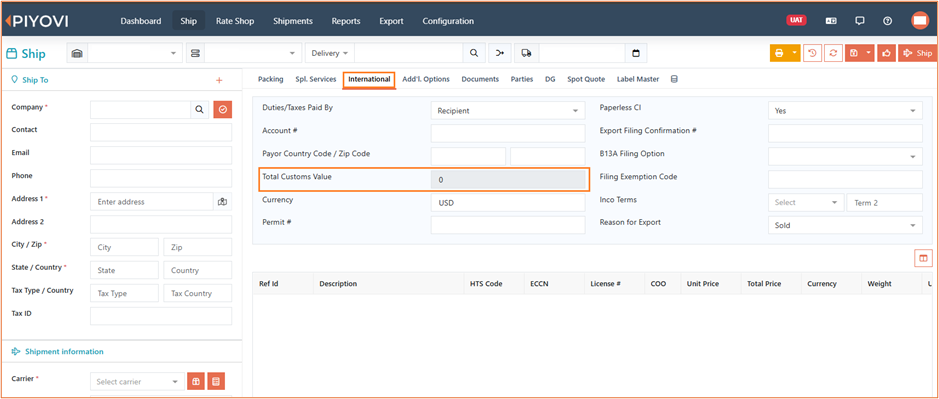
Previously, users had the ability to manually enter or edit the Total Customs Value, which could lead to inconsistencies or carrier errors if line-level unit prices were not appropriately specified.
This field is now disabled, as the customs value is a system-calculated field based on the unit price and quantity at the line-item level. Attempting to bypass this would result in errors from the carrier, which mandates valid line-level pricing.
By disabling manual edits to Total Customs Value, we ensure better data integrity, improved compliance with carrier requirements, and a more consistent user experience.
4. Webhook Error Notification to Shipper User
We have added the webhook notifications by introducing a new option to Notify the Shipper user via email when a webhook fails during shipment processing. Previously, error responses were only sent to the email address configured in the webhook settings.
With this update, a new toggle Notify to Shipper has been added to the Add Webhook screen. When enabled, Piyovi will trigger an error notification email to the shipper user (i.e., the user who processed the shipment), in addition to sending the response to the webhook email.
This feature ensures that users are promptly informed of integration issues, enabling quicker resolution and reducing shipment processing delays.
Steps to Enable Shipper Notification
- Navigate to Configuration > Webhook.
- Open Add Webhook or Edit Webhook.
- Toggle Notify to Shipper to ON.
- Click Save to apply changes.

5. Manifest Printing Enhancement
We have enhanced the manifesting workflow to allow customers to automatically print the Generic Manifest document directly from the Shipment screen, eliminating the need to manually navigate to the Manifest screen after manifesting shipments.
Steps to Enable Manifest Printing
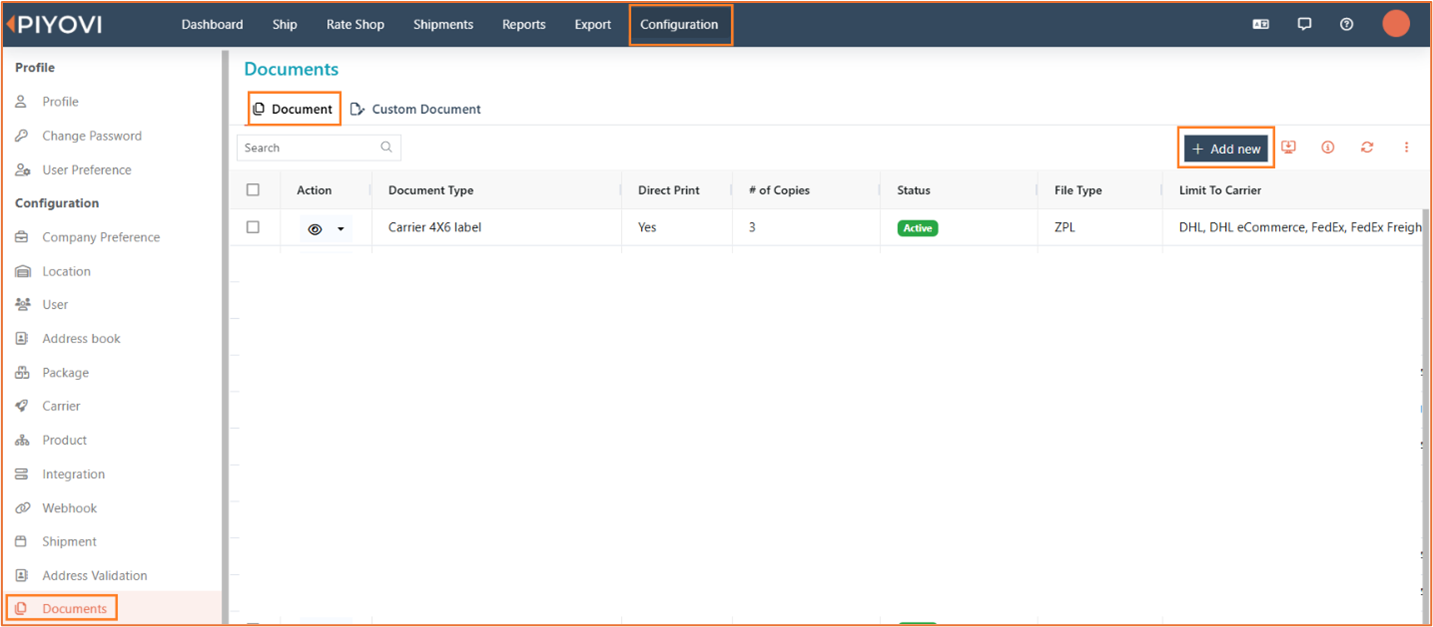
- Document Configuration
- Go to Configuration > Documents > Document.
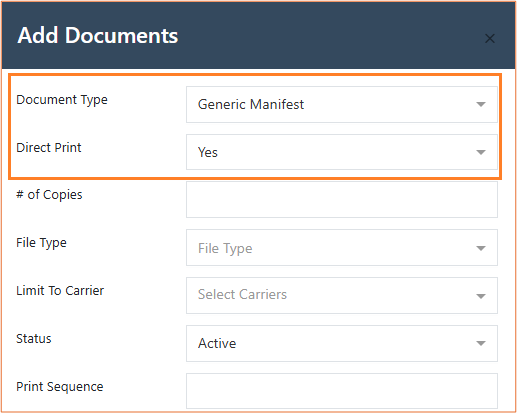
- Click Add New or Edit.
- Set Document Type to Generic Manifest.
- Set Direct Print to Yes.
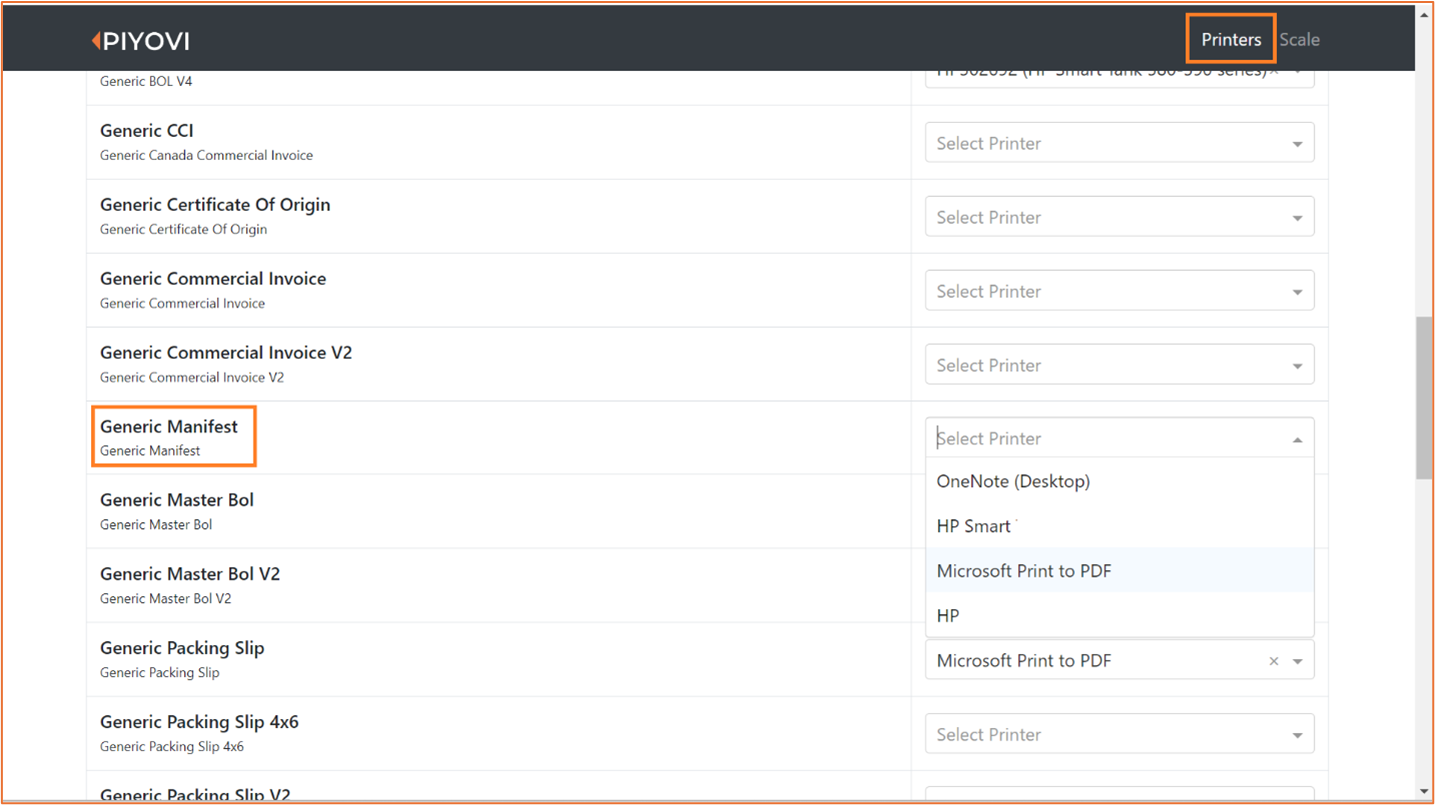
- Printer Configuration:
- Open the Piyovi Desktop Application.
- Under the Printers tab, assign a printer for the Generic Manifest document.
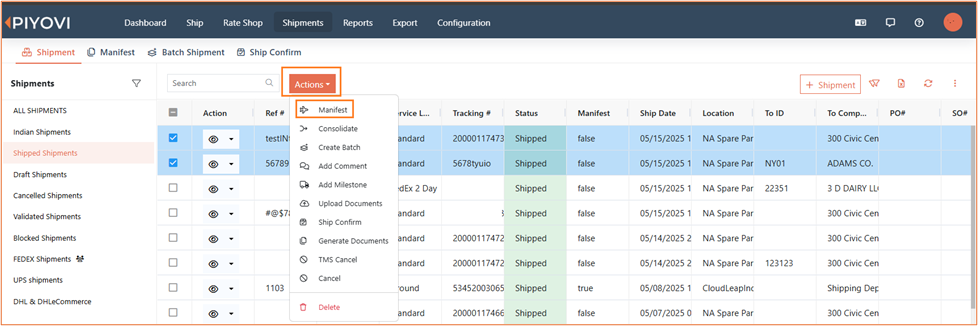
- Manifest Process:
- Navigate to the Shipment screen.
- Select shipments in Shipped status.
- Click Actions > Manifest.
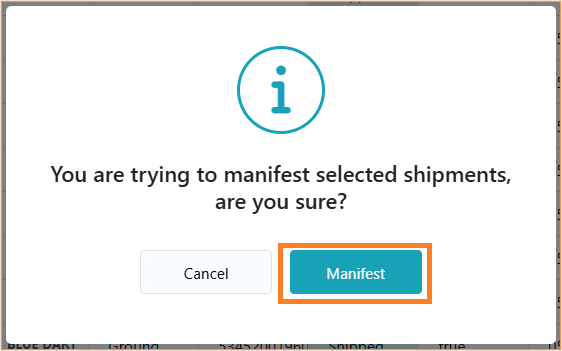
- In the confirmation popup, click Manifest.
Feature Overview
- If the Generic Manifest document is Active, has Direct Print enabled, and the Limit to Carrier matches the shipment carrier, the manifest will auto-print.
- If multiple shipments with the same carrier are selected, a single document will be printed.
- If shipments with different carriers are selected, separate documents will be printed for each carrier.
- If no matching configuration exists for the selected carrier(s), the manifest will still be created, but no document will be printed.